


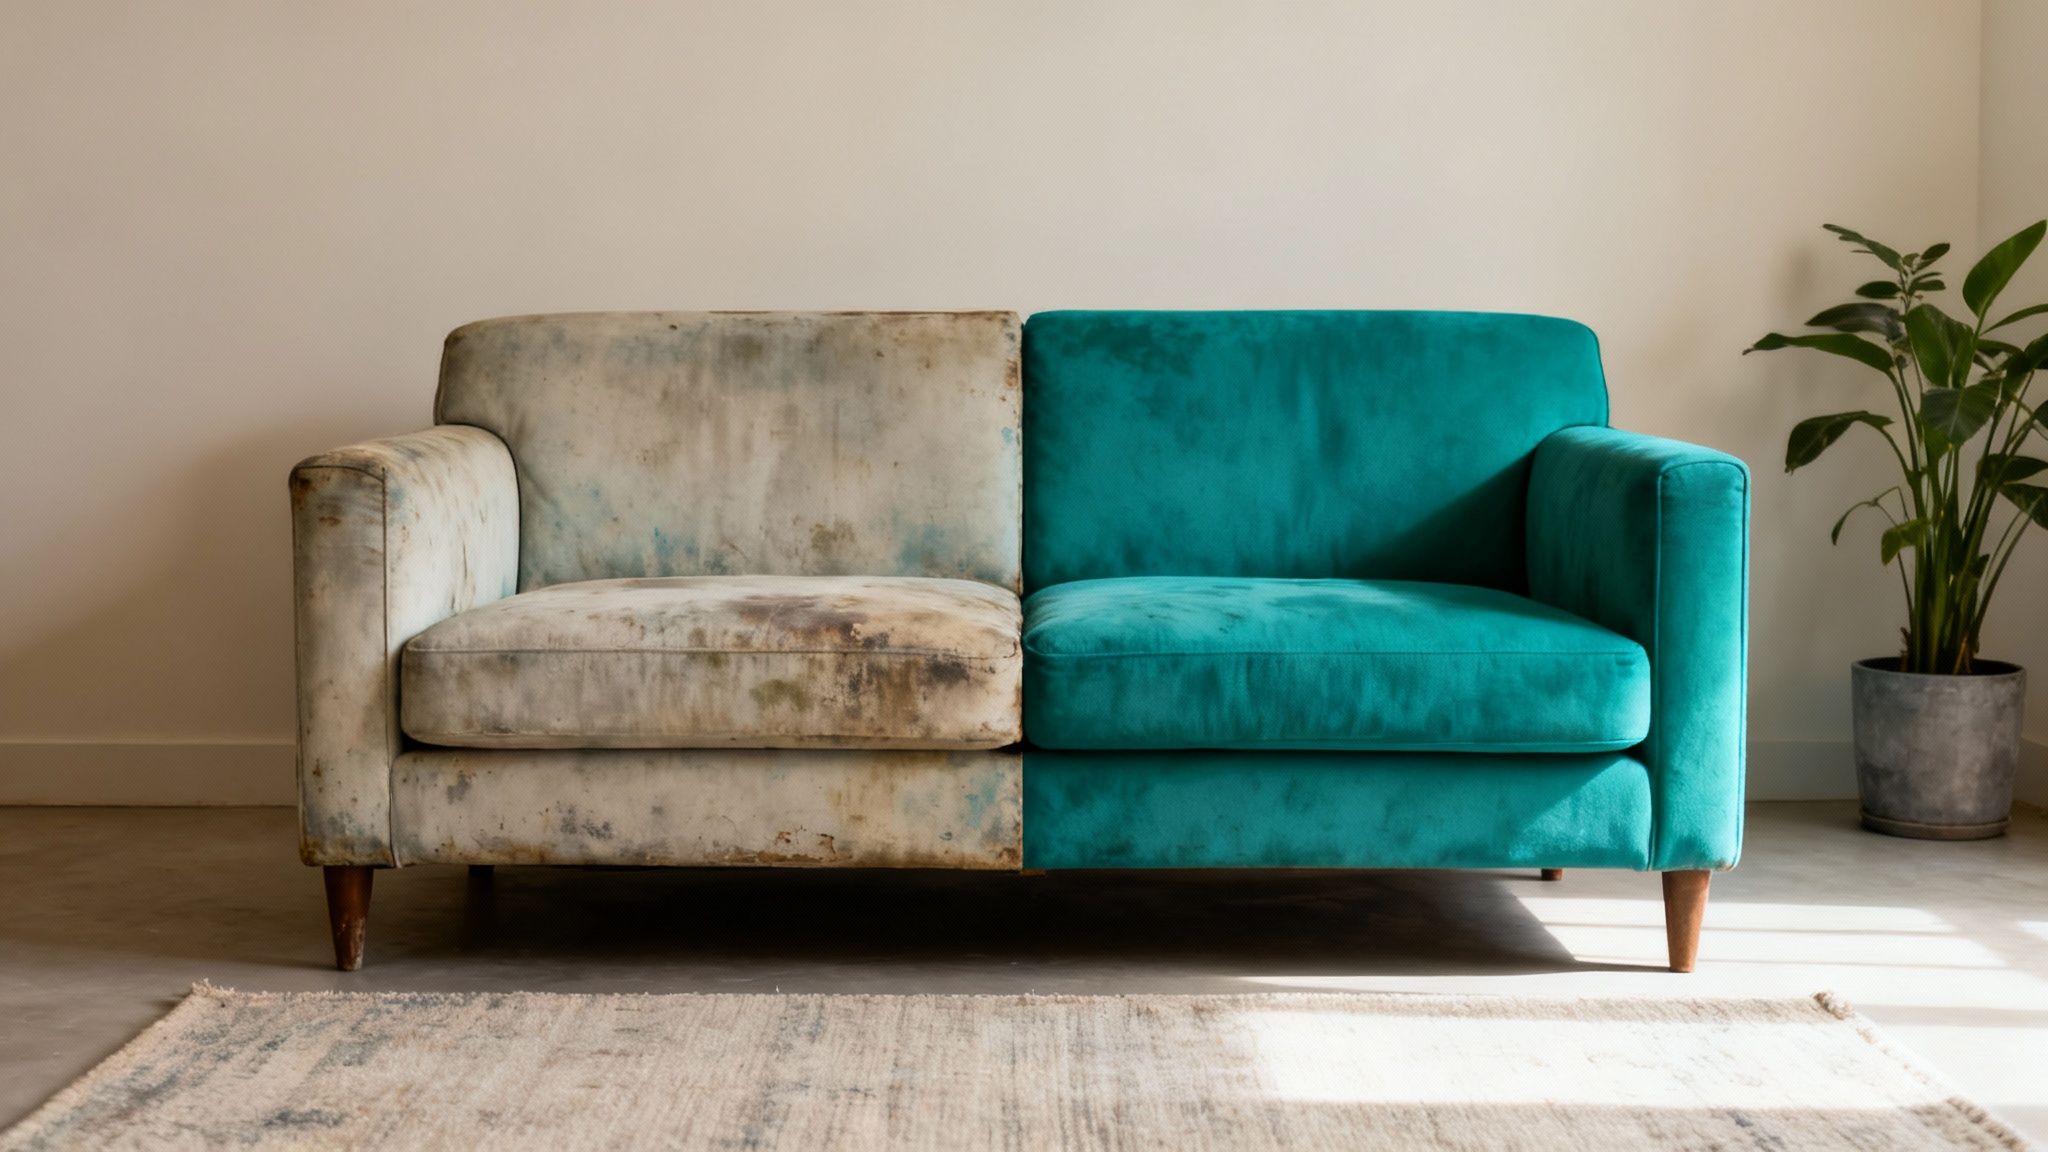
So, can you dye a sofa? The short answer is yes, dyeing a sofa is possible. But the honest answer is that it's a high-stakes DIY project, and the odds of a perfect finish aren't always in your favour. Your success hinges almost entirely on what your sofa is made of. Natural fibres like cotton and linen tend to drink up dye beautifully, but synthetics like polyester often resist it, leading to a patchy, disappointing mess.
Is Dyeing a Sofa the Right Choice for You?
Before you dive in and start mixing colours, it’s worth taking a moment to figure out if this is genuinely the best path for you and your sofa. The idea of that stunning, Pinterest-worthy transformation is incredibly tempting, but it comes with real risks—uneven results, permanent fabric damage, and a much bigger time commitment than most people expect. This isn’t a quick job for a Sunday afternoon; it’s a multi-day effort that can easily go sideways.
Evaluating Your Situation
Think about what you're trying to achieve. Are you a homeowner chasing a very specific, custom shade you just can't find in the shops? If so, and if your sofa is made from a natural, dye-friendly fabric, then the effort might just pay off. You could create a truly one-of-a-kind centrepiece for your living room.
But what if you're a landlord trying to quickly freshen up a rental property? In that scenario, dyeing is usually a terrible idea. The risk of the colour bleeding onto a tenant's clothes or fading unevenly is just too high, creating more headaches than it solves. A durable, washable sofa cover is a much safer and more practical solution.
The Reality of DIY Sofa Dyeing
Let's be blunt: most modern sofas simply aren't made to be dyed. The UK furniture market, where per capita spending is expected to hit £150 in 2025, is built on selling new pieces, not helping you restore old ones. While UK households gave a new look to an estimated 12.5 million sofas in 2024, only a tiny fraction of those involved dyeing, mainly because the failure rate is so high.
In fact, a 2023 consumer report found that a whopping 62% of users were unhappy with home dye kits. They cited problems like the colour fading within six months and the fabric feeling noticeably stiff and scratchy afterwards.
Key Takeaway: A successful DIY sofa dye job is the exception, not the rule. The process is unforgiving, and mistakes are often permanent, potentially ruining your furniture for good.
Making an Informed Decision
Your final decision should come down to a balance of three things: your sofa's condition, its material, and your own DIY confidence. If you have a high-quality cotton or linen sofa with some minor fading and you're a seasoned DIYer who loves a challenge, you might get a fantastic result.
For most people, though, the risks simply outweigh the rewards. Before you commit to changing your sofa's colour, it's crucial to understand the challenges you're up against. This article, Is Dyeing Furniture Fabric a Smart Move or a Design Disaster?, offers some brilliant expert insights to help you weigh your options. By honestly assessing all the factors, you'll get a much clearer picture of whether dyeing is a brilliant idea or if a simpler alternative might be the smarter path to a fresh new look.
Dyeing a Sofa vs Using a Sofa Cover: A Quick Comparison
To help you decide, let's put the two main options side-by-side. This table breaks down the key things you need to think about for each method.
| Factor | Dyeing a Sofa | Using a Sofa Cover |
|---|---|---|
| Effort & Time | High. A multi-day project requiring prep, application, and drying time. | Low. Can be fitted in under 10 minutes for a total transformation. |
| Cost | Moderate. Dye, tools, and protective gear can add up. | Low to Moderate. A fraction of the cost of reupholstery or a new sofa. |
| Risk | High. Risk of uneven colour, fabric damage, and colour bleed. Mistakes are often irreversible. | Very Low. No risk of damaging the original sofa. Can be easily removed or changed. |
| Reversibility | None. The colour change is permanent. | Total. You can switch back to the original look or try a new cover anytime. |
| Durability | Variable. Prone to fading, especially in sunlight. Can rub off on clothing. | High. Protects the original fabric from spills, stains, and wear. Often machine washable. |
| Best For | Experienced DIYers with natural-fibre sofas seeking a unique, custom colour. | Almost everyone seeking a quick, affordable, and risk-free style update. |
Looking at the options this way makes it pretty clear. While dyeing offers a permanent change, the process is fraught with risk. A sofa cover, on the other hand, gives you a fresh new look instantly, with none of the stress and all of the flexibility.
Matching the Right Dye to Your Sofa Fabric
This is the make-or-break moment of the entire project. Choosing the right dye isn’t just important; it’s everything. If you get this wrong, you're heading straight for a blotchy, uneven disaster that no amount of wishful thinking can fix. The success of dyeing a sofa depends entirely on the marriage between your chosen dye and the fabric it's intended for.
First, you need to play detective and figure out exactly what your sofa is made of. Your best starting point is the care tag, usually tucked away under a cushion or on the frame. If you’re lucky, it will clearly state the material composition, like "100% Cotton" or "Polyester Blend."
If the tag is missing or the text has worn away, you'll need to run a couple of simple tests on a hidden area, like the fabric on the underside of the sofa.
Identifying Your Sofa Fabric at Home
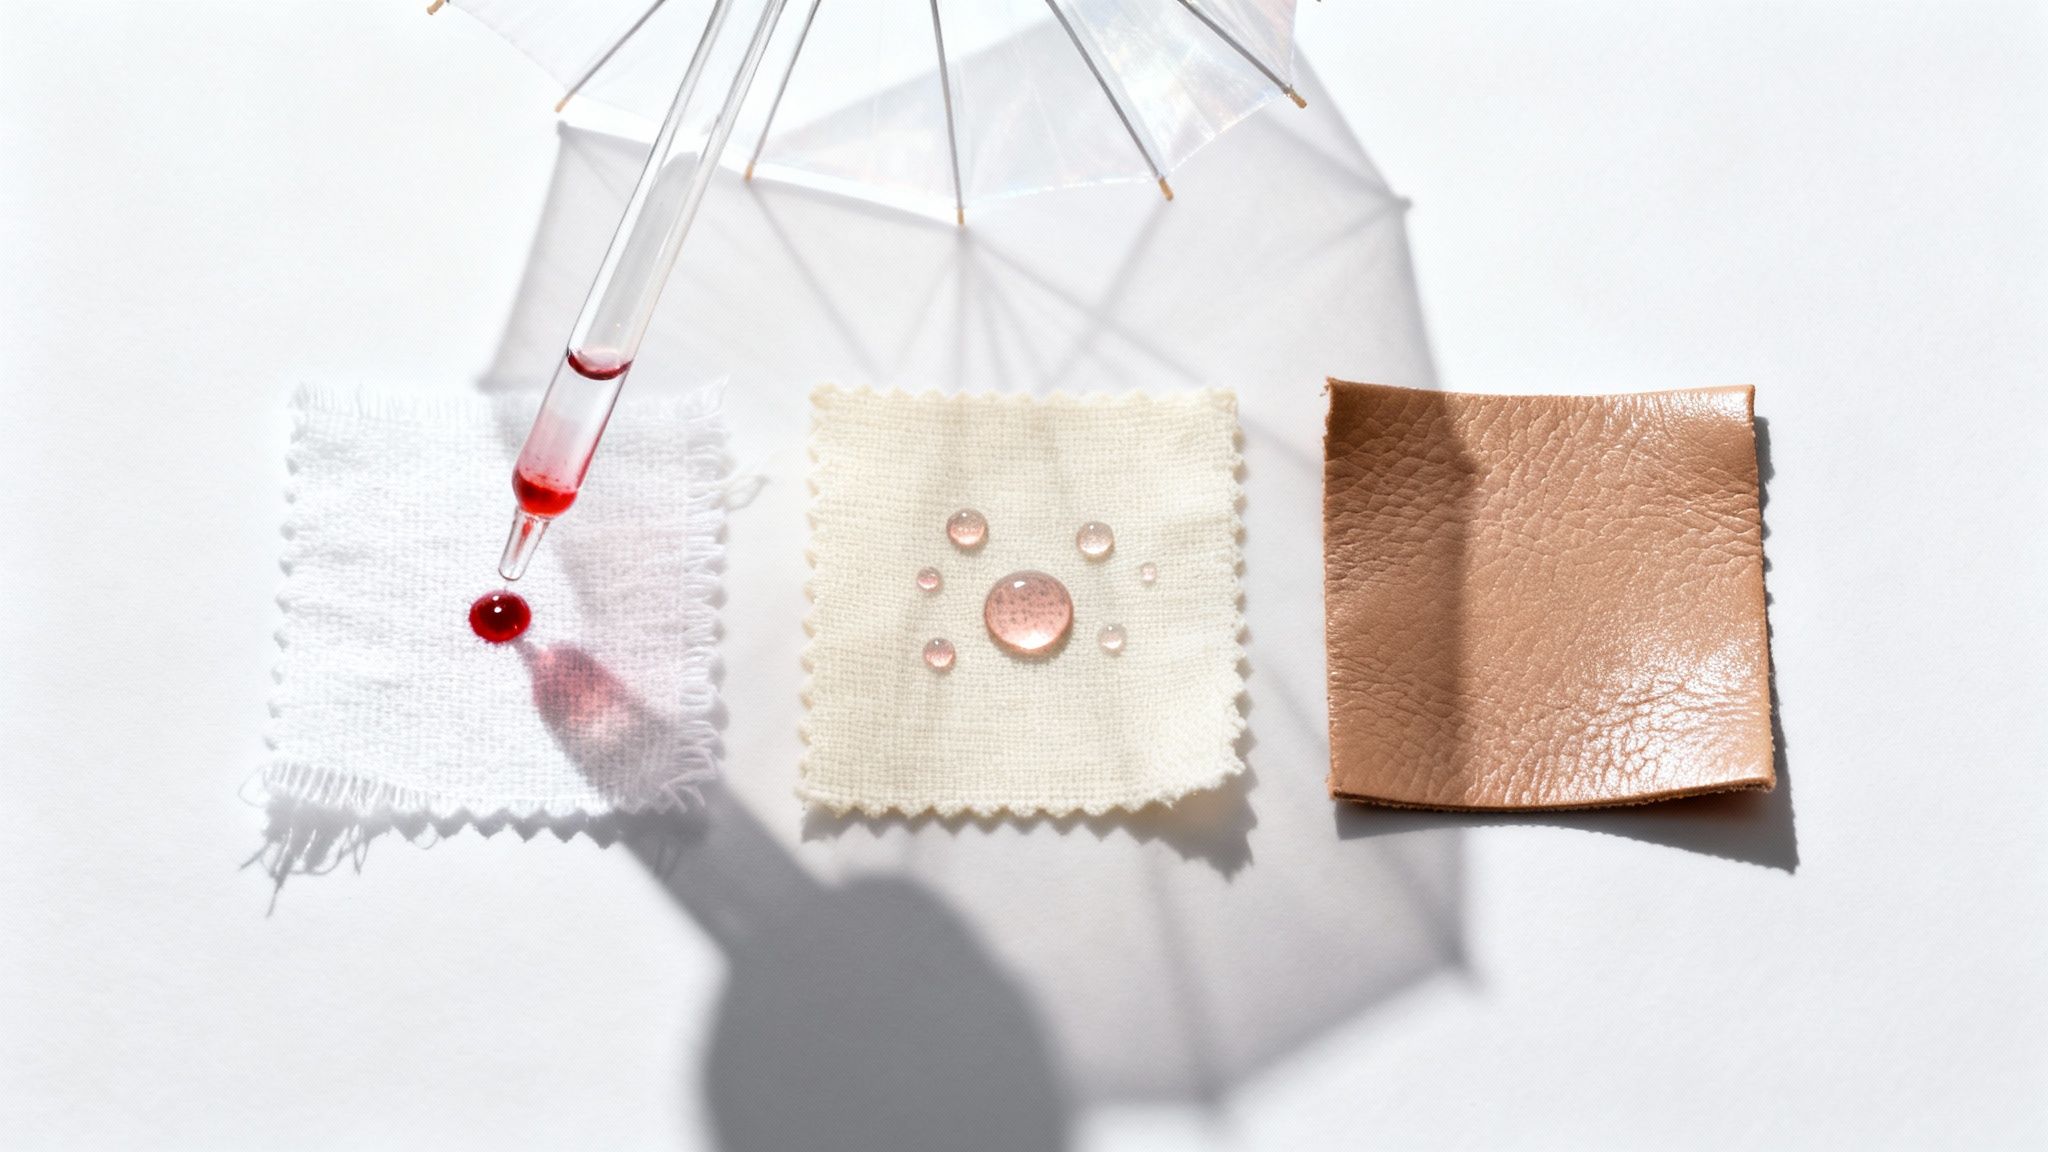
The simplest check is the water absorption test. Drip a single drop of water onto the fabric. If it soaks in quickly, you likely have a natural fibre like cotton, linen, or viscose. If the droplet beads up and sits proudly on the surface, you’re almost certainly dealing with a synthetic material like polyester, nylon, or acrylic.
For a more definitive answer, you can try a burn test, but this requires extreme caution. Snip a tiny thread from a hidden seam and, holding it with tweezers over a fireproof dish, carefully bring it close to a flame.
- Natural Fibres (like cotton): These will catch fire and burn with a yellow flame. They smell a bit like burning paper or leaves and leave behind a fine, soft ash.
- Synthetic Fibres (like polyester): These will melt and shrink away from the flame, often dripping and forming a hard, black bead. The smell will be distinctly chemical, a bit like burning plastic.
Understanding this difference is crucial. Natural fibres have porous structures that soak up dye, giving you that deep, rich colour you’re after. Synthetics, on the other hand, are essentially plastic; they repel water-based dyes, which is why a standard fabric dye will just slide off, leaving a streaky, awful mess. You can find out more about how different materials perform by exploring our guide to the best fabric for a sofa.
Choosing the Right Type of Dye
Once you’ve cracked the code of your fabric, you can finally pick the right product. The world of dyes is vast, but for a sofa project, it boils down to just a few key categories. Never, ever assume an "all-purpose" dye will work on everything—it won't.
For Natural Fibres (Cotton, Linen, Viscose) Your best bet here is a fibre-reactive dye. These dyes create a permanent chemical bond with the fabric's molecules, making them incredibly colourfast and resistant to fading. They really are the gold standard for achieving a professional, even finish on plant-based materials.
For Synthetic Fabrics (Polyester, Nylon, Acrylic) Let’s be honest, dyeing synthetics is notoriously difficult. Standard dyes just won't work. You’d need a specialised disperse dye that requires high heat to bond, which is completely impractical for a whole sofa. The realistic solution isn't a dye at all, but a fabric paint or spray. These products coat the surface of the fibres rather than penetrating them. Look for sprays designed specifically for upholstery to avoid a stiff, crunchy texture.
For Leather and Vinyl Sofas Trying to use a textile dye on leather will end in ruin, plain and simple. You absolutely need a dedicated leather dye or paint. These are formulated to either penetrate and condition the leather or create a flexible, durable coating on top. They often come in kits with a preparer solution to strip the original finish and a sealer to protect the new colour.
Expert Tip: Always buy more dye than you think you'll need. Running out midway through is a guaranteed way to get an uneven, two-toned finish, as matching a second batch perfectly is nearly impossible. I always aim for at least 20-30% more than the manufacturer's estimate for the size of the sofa.
Your Essential Toolkit and Preparation Guide
Let me be blunt: the secret to a professional-looking finish when you dye a sofa isn't in the dye bottle. It’s in the painstaking prep work you do before you even think about applying the colour. Rushing this stage is the single biggest reason for blotchy, uneven results that scream "bad DIY".
Think of your sofa as a painter’s canvas. You simply can’t create a masterpiece on a dirty, unprepared surface. Proper prep allows the dye to soak in or stick to the fabric evenly, giving you that smooth, consistent colour you're hoping for. Skipping this is a false economy—it almost guarantees you’ll be disappointed.
It’s this exact unpredictability that makes dyeing a sofa a bit of a niche, and often flawed, trend. While the UK home furniture market is set to hit USD 22.69 billion by 2030, most of that is still focused on new purchases. Only a small fraction, around 5-7%, of furniture refresh projects even involve dyeing, partly because 45% of sofas made locally use durable synthetics that won't take dye. A 2024 poll of 5,000 UK buyers revealed that 68% ditched their dyeing plans after reading horror stories about patchy results, which just goes to show how critical this prep phase is. You can find more insights on the UK furniture market in this detailed research.
Assembling Your Dyeing Toolkit
Before you start, do yourself a favour and lay out everything you need. Having your complete toolkit ready will stop you from frantically searching for a sponge or more masking tape with dye-covered hands. You’ll thank yourself for it later.
Here’s a checklist of the absolute essentials:
- Protective Gear: This is non-negotiable. Get yourself some good rubber gloves, safety goggles, and wear old clothes you don't mind ruining. Dye splashes, and you need to protect your skin and eyes.
- Surface Protection: You’ll need large plastic drop cloths or old sheets to cover the floor and any nearby furniture. Masking tape is also a must-have for protecting wooden legs, metal studs, or any other bits you don't want dyed.
- Cleaning Supplies: A good vacuum with an upholstery attachment is your starting point. You'll also need a mild detergent, a few clean cloths or sponges, and a bucket.
- Application Tools: Depending on your dye, this could mean a spray bottle for even misting, natural sea sponges for blending, or a set of small artist's brushes for getting into seams, tufts, and corners.
- Mixing Equipment: Have a few plastic buckets or bowls ready for mixing your dye solution. Use separate ones for rinsing your tools so you don't contaminate your colours.
The Crucial Deep Clean
Your sofa might look clean, but years of use leave behind an invisible layer of dirt, body oils, and residue from old cleaning products. These act as barriers, blocking the dye from absorbing properly and leading straight to a patchy, unprofessional finish. A deep clean is probably the most critical part of this whole process.
Start by giving the entire sofa a really thorough vacuuming. Use the crevice tool to get right down into the seams and under the cushions where dust and crumbs love to hide. This first step gets rid of all the loose debris.
Next, you need to wash the fabric. Mix a tiny amount of mild, colour-free detergent with warm water to create some suds. Using a clean sponge, gently scrub the whole surface of the sofa, working in small, manageable sections. Be careful not to completely soak the fabric. Follow up with a different sponge dipped in clean water to "rinse" the area by wiping away the soap residue. You can find more expert advice in our guide on the best way to clean a fabric sofa.
Important Reminder: Let your sofa dry completely before you even think about the next step. This can take up to 24 hours. Applying dye to damp fabric will just dilute the colour and cause it to run, ruining all your hard work.
Special Preparations for Different Materials
Not all sofa surfaces are created equal. Leather and certain synthetic fabrics need a few extra steps to make sure the new colour will actually stick.
If you’re tackling a leather sofa, you absolutely must strip its factory finish first. This protective topcoat is designed to repel stains—and it will repel your dye just as effectively. Use a product called a de-glazer or a leather preparer, applying it with a clean cloth to gently remove that glossy seal.
For synthetic materials that you’re planning to treat with a fabric spray or paint, you need to create a surface the paint can grab onto. Lightly scuffing the fabric with a fine-grit sanding sponge can give the paint something to grip, which helps with adhesion and gives you a more durable finish. Always, always test this on a hidden spot first to make sure it doesn't damage the fabric.
Getting Your Dye Application Just Right for a Smooth Finish
You’ve done the hard graft of cleaning and prepping, and now for the exciting part—actually applying the colour. This is where you see your vision come to life, but I can't stress this enough: patience is your most important tool here. The real secret to a flawless, professional-looking finish isn't about speed; it's about methodically building up thin, even layers to create a deep, consistent colour.
Resist the temptation to get it all done in one go. Slapping on a single thick coat is a surefire way to end up with drips, uneven patches, and a finish that just looks amateurish. Think of it more like painting a wall—several light coats will always look infinitely better than one heavy one. This approach gives the dye time to absorb properly and gives you far more control over the final look.
The flowchart below recaps those crucial preparation steps. They really are the foundation for a great result.
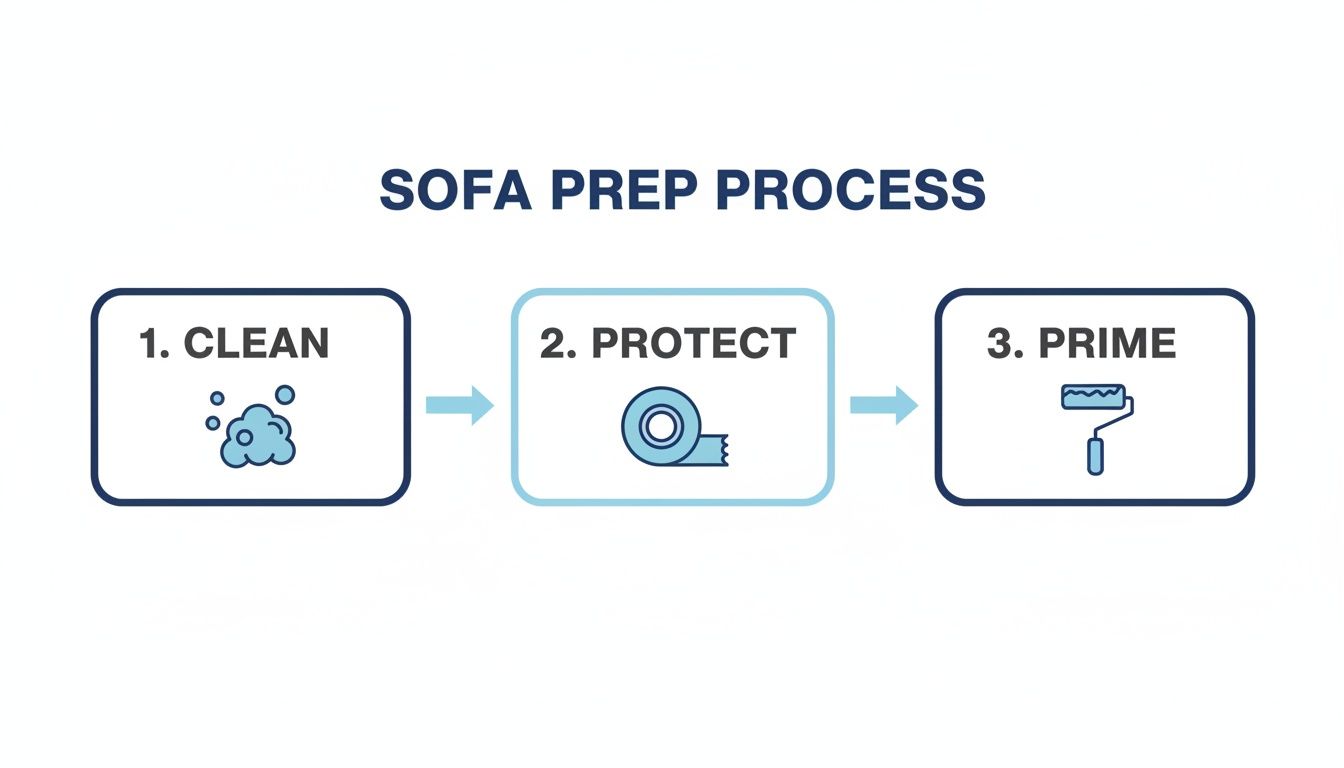
As you can see, the journey to a beautiful finish begins long before you even open the dye bottle.
Choosing Your Application Tools
The right tool for the job really depends on the type of dye you're using and the fabric you're working with. It pays to have a few different applicators handy so you can switch up your technique for different parts of the sofa, from the large, flat cushions to those fiddly little corners.
- Spray Bottle: For liquid textile dyes on fabric sofas, a simple spray bottle is often your best mate. It helps you apply a fine, even mist over large areas quickly, which is key to preventing the fabric from getting oversaturated on the first go.
- Sponge: A natural sea sponge is brilliant for blending and working the dye right into the fabric. After misting an area, I use a slightly damp sponge in gentle, circular motions. This helps massage the colour into the fibres without leaving any harsh lines.
- Small Brushes: You'll absolutely need a few small artist's brushes for the detailed bits. Think seams, button tufts, piping, and corners. They give you the precision you need to work the dye into every nook and cranny where a spray or sponge just can't reach.
The Art of the ‘Wet Edge’
To avoid those tell-tale lines and patches between sections, you need to maintain what’s known as a ‘wet edge’. It simply means you should always apply new dye directly next to an area that is still wet from the last bit you applied. This allows the colours to blend together seamlessly right on the fabric.
I find it best to start in one corner of the sofa—say, the top of an armrest—and work across and down in small, manageable sections. Don't spray a whole cushion and then jump to the backrest. Instead, work methodically in a grid-like pattern, blending each new section into the last before it has a chance to dry.
Pro Tip: Keep your spray bottle moving in a constant, light, sweeping motion, holding it about 8-10 inches from the fabric. If you linger in one spot for even a second too long, you’ll create a dark, oversaturated patch that’s incredibly difficult to fix later on.
Building Colour with Multiple Layers
Your first coat will probably look a bit light and maybe even patchy. Don’t panic—this is completely normal. The goal of that first layer isn't to achieve the final colour; it's just to lay down an even base. Let this initial coat dry completely, which could take a few hours depending on the dye and the humidity in the room.
Once it's dry to the touch, you can apply your second coat, again using thin, even layers and maintaining that wet edge. You'll immediately see the colour becoming richer and more uniform. For a really deep, vibrant change, you should plan for at least two to three thin coats. You might need even more if you're making a dramatic switch from a light to a dark colour. Patience here truly pays off.
Heat Setting for a Permanent Finish
Right, the final step! Once you’re happy with the colour and the sofa is completely dry (I always recommend waiting a full 24 hours), you need to heat-set the dye. This creates a chemical reaction that permanently bonds the dye to the fabric fibres. It’s what makes the colourfast and stops it from rubbing off on your clothes later.
The safest and most effective method is using a standard hairdryer on a medium to high heat setting. Hold it a few inches from the surface and move it continuously over the entire sofa, making sure every single inch gets treated. You could also use an iron on a non-steam setting, but be sure to place a thin cloth between the iron and the sofa to prevent scorching. Don't rush this final stage; it's the seal of approval on all your hard work.
Troubleshooting the Inevitable Hiccups and Looking After Your Work
Even when you’ve done everything by the book, dyeing a sofa is one of those projects where little surprises can pop up. You might step back to admire your handiwork, only to spot a patchy area that just didn’t take the colour, or find the fabric feels a bit stiff once it’s dry. Don't panic—most of these common issues are fixable with a bit of patience and the right technique.
This isn't always down to bad luck; sometimes, the fabric itself is the real culprit. A 2024 Office for National Statistics survey found that 18% of DIY dyeing jobs resulted in uneven colour, often because of the sneaky polyester blends so common in modern UK sofas. This is a perfect example of why an alternative like a slipcover can be a smarter move, giving you a fresh new look without the risks. You can discover more about the challenges of modern furniture manufacturing on ibisworld.com.
Fixing Patchy or Uneven Coverage
Inconsistent colour is easily the most frequent frustration. You’ll see lighter patches where the dye didn’t quite sink in, or dark spots where it got a bit oversaturated. This often happens in high-wear areas like armrests, where years of built-up residue can be tougher to shift than you think.
If you’ve got a light patch, the fix is usually another targeted layer of dye.
- Let It Dry Completely: First, wait for the entire sofa to be bone dry. You can't properly judge the final colour when it's still damp.
- Mix a Weaker Solution: Prepare a small batch of your dye, but this time, dilute it with about 25% more water than you used for the main coats. This gives you far more control and helps the new layer blend in seamlessly.
- Apply with a Sponge: Using a small, slightly damp sea sponge, gently dab the diluted dye onto the patchy spot. I find it’s best to start from the centre of the patch and work your way out, feathering the edges to blend it into the surrounding colour.
- Blot, Don't Rub: Gently blot the area with a clean, dry cloth to lift any excess dye and soften the transition. Let it dry completely before you decide if another light coat is needed.
Dealing with Colour Bleed and Rub-Off
There's nothing worse than finishing your project, only to find the new colour is rubbing off on your clothes. This is almost always a sign that either the dye wasn't properly heat-set, or there was just too much excess dye left sitting on the surface of the fibres.
If you notice colour transfer, you need to go back and set the dye again. Go over the entire sofa with a hairdryer on its highest heat setting, moving it constantly to make sure every inch gets treated. For fabric, you can also place a clean, dry cloth over a section and press it with a hot, dry iron (no steam!) for about 30 seconds. This really helps to lock the pigment into the fibres for good.
Restoring a Soft Texture
Sometimes, particularly if you’ve used fabric paints or sprays, you might find the sofa feels a bit stiff or crunchy to the touch. The binders in these products can tighten the fabric's weave as they dry, but this is usually an easy fix.
A simple trick is to gently go over the fabric with a soft-bristled upholstery brush. Brushing in gentle, circular motions helps to break up that stiffness in the paint and soften the fibres without damaging the colour. For a really stubborn case, you can lightly mist the sofa with a solution of one part fabric softener to three parts water, then give it another brush once it’s dry.
Aftercare Is Everything: Once your sofa looks perfect, your job shifts from creator to caretaker. Proper maintenance is what will keep your newly dyed sofa looking vibrant and fresh for years to come.
After the dye has fully cured (I always recommend waiting at least 72 hours), applying a fabric protector spray like Scotchgard is a fantastic idea. This creates an invisible barrier that helps repel spills and stops stains from setting in, buying you precious time to clean up messes. For regular cleaning, stay away from harsh chemical cleaners. Instead, just stick to vacuuming with a soft brush attachment and spot-cleaning spills immediately with a damp cloth and a touch of mild, clear soap.
The Smarter Alternative to Dyeing Your Sofa
After weighing up the risks and sheer effort of dyeing a sofa, it's pretty clear that the DIY approach is a huge gamble. The truth is, there's a much simpler, guaranteed way to get that fresh new look without the stress, the mess, or the potential for a mistake you can't undo.
Let's talk about high-quality, fitted sofa covers. I'm not talking about those old, baggy throws your nan used to use; modern slipcovers offer a sleek, almost custom-like finish that can completely transform your furniture in minutes. It's the perfect solution for anyone craving a living room refresh without the commitment.
A Practical Solution for Every Home
Different homes have different needs, but a good quality cover can meet them all.
-
For landlords and rental property owners: A durable, machine-washable cover is an absolute lifesaver. It protects your investment from tenant wear and tear, making sure the sofa stays in pristine condition for years.
-
For families with kids and pets: Life gets messy. A resilient, spill-proof cover means you don’t have to panic about muddy paws or sticky fingers ruining your furniture.
-
For the style-conscious homeowner: Fancy a change with the seasons? A slipcover lets you switch from a cool summer linen look to a cosy winter velvet in under ten minutes.
At The Sofa Cover Crafter, we provide stretchy, easy-to-install covers that deliver a smooth, wrinkle-free finish. With a huge range of colours and textures, it's a complete, affordable furniture makeover that avoids all the pitfalls of a DIY dye job.
This approach gives you an instant transformation with zero risk. You get the aesthetic upgrade you want while adding a practical layer of protection to your furniture. To see just how easy it is, have a look at our simple guide on how to cover a couch for a perfect fit every time.
If you're still set on a hands-on project but dyeing isn't the right fit, you could explore other innovative methods. For example, some homeowners are turning to durable and stylish furniture wrapping to update their pieces. Ultimately, finding a reliable and reversible solution is key to a successful and stress-free home refresh.
A Few Final Questions Answered
We’ve walked through the entire process, but you probably still have a couple of practical questions floating around. Let's tackle the most common ones I get asked to make sure you're feeling confident before you start.
How Long Does a Dyed Sofa Last?
Honestly, this all comes down to the quality of your prep work and the type of dye you used. If you've properly applied and heat-set a good fibre-reactive dye on something natural like cotton, you can expect it to last for several years with the right care.
Just be aware that it will almost certainly be more sensitive to fading from direct sunlight than the original factory colour. Fabric paints on synthetic materials might also start to show a bit of wear and tear more quickly in high-friction spots, like the edges of the seat cushions.
How Much Does It Cost to Dye a Sofa?
The final bill can vary quite a bit. For a small two-seater, you might get away with spending £30-£50 on the dye and supplies. But for a large corner sofa, it would be easy to push that cost over £100.
Don't forget to add in all the extras like drop cloths, gloves, sponges, and brushes – those little things add up. It’s definitely a more affordable route than reupholstery, but it's a much riskier one.
A Quick Tip: Before you even think about touching the main sofa, please test your dye on a hidden area or a separate fabric swatch. This one simple step can save you from a very expensive and irreversible mistake. It'll confirm the final colour and show you exactly how the fabric is going to react.
What Is the Biggest Mistake to Avoid?
Without a doubt, the number one error is rushed or improper cleaning. Any leftover dirt, oils from hands, or even residue from cleaning products will act as a barrier. It stops the dye from soaking in evenly, and you'll end up with a blotchy, unprofessional-looking mess.
A really thorough deep clean is completely non-negotiable.
Ultimately, if the risks and sheer effort of dyeing a sofa feel a bit too daunting, you can get a stunning, stress-free transformation in minutes. Why not explore the stylish and practical collection at The Sofa Cover Crafter and find your perfect new look today? Visit us at https://thesofacovercrafter.co.uk.