



The fabric on a dining chair usually gives up long before the frame does. You can reupholster a dining room chair yourself when the seat is a removable drop-in pad and the timber still feels solid. A fixed upholstered shell, or a chair with real age and value, is a bigger job than a first attempt should take on.
A tired seat can stand out in a set you still want at the table. Torn cloth, a stain that will not shift, or a pad that has gone flat. New fabric is worth buying only after you know which of those issues you have. Staples change the cover. They do not glue a loose joint or refill a collapsed seat.
Table of Contents
- Can You Reupholster a Dining Room Chair Yourself?
- Is Your Dining Chair Worth Reupholstering?
- What Tools and Materials Do You Need to Reupholster a Dining Chair?
- How Do You Remove the Seat and Strip the Old Fabric?
- How Do You Cut and Staple the New Fabric?
- How Do You Refit the Seat and Fix Common Problems?
- When Should You Choose a Stretch Chair Cover Instead?
Can You Reupholster a Dining Room Chair Yourself?
Yes. A dining chair with a removable drop-in seat is a realistic job for a careful beginner, while a fully upholstered fixed seat or a valuable antique dining chair is better left with a professional upholsterer.
Give the first dining chair an unhurried session rather than a rushed ten minutes. Hurry shows up as diagonal wrinkles and corners that sit proud of the board. The reason to do the work is not only a fresher colour. A sound chair that stays in use is one less bulky item sent for disposal. SUEZ reports that the UK discards approximately 1.6 million tonnes of bulky waste each year, with furniture about 42% of that total.
The job has a clear order. Check the chair, lift the seat, strip the old fabric, rebuild padding only where it has failed, cut and staple the new cloth, then refit and sit on it. If the only fault is stained or dated fabric and the pad still feels comfortable, a no-sew route is covered later.
Is Your Dining Chair Worth Reupholstering?
A dining chair is worth reupholstering when the frame is solid and only the fabric or the padding has failed. New cloth on a dining chair cannot fix a wobble.
Spend nothing until three checks are done. Press the seat. A permanent dip, or foam that stays crushed under your hand, means the padding has collapsed. A new cover over that dip will look tidy for a day and then show the same hollow. Turn the chair over and look at a drop-in seat base. Cracks or splits in the board mean the base needs replacing or a proper repair before any fabric goes on. Rock the chair side to side. Movement in the joints means the frame needs gluing and clamping first, because upholstery fixes the seat, not the structure.
Practical rule: If the dining chair moves when you sit, stop. Cloth will not make that frame safe.
Woodworm, deep cracks and broken rails are stop signs, not weekend jobs. The same is true of a high-turnover rental or holiday-let dining chair, where a pretty DIY cover that fails in a month is worse than a professional structural repair or a simple reusable spare. Reuse Network reported that it and reuse charities across the UK reused 2.29 million furniture and electrical items in its 2025 social-impact reporting. Reuse only helps when the repaired dining chair stays safe and durable.
If the verdict is that the dining set is fine and the tired piece is the sofa, the keep-or-replace thinking is different. Use is it worth reupholstering a sofa for that decision, and do not copy it onto a dining chair. Once a dining chair passes the frame check, cloth choice comes next: settle on an upholstery-weight fabric before you buy a metre of anything.
| What you find | What it means | What to do |
|---|---|---|
| Solid frame, worn or stained fabric, pad still springs back | Cosmetic failure only | Reupholster the drop-in seat, or use a stretch cover |
| Permanent dip or collapsed foam | Padding has failed | Replace the padding, then recover |
| Cracked seat board | The base will not hold staples | Repair or replace the board before fabric |
| Joints move when you rock the chair | Structural fault | Glue and clamp, or send it to a furniture repairer |
| Woodworm, broken rails, or a fixed antique shell | Beyond a first DIY seat | Stop, and get a professional opinion |
What Tools and Materials Do You Need to Reupholster a Dining Chair?
A dining chair seat needs a screwdriver, a staple remover or tack lifter, a staple gun with staples, sharp fabric scissors, upholstery-weight fabric, and replacement padding only if the old pad has collapsed. A dust cover for the underside is optional, and only worth adding if the original seat had one.
We do not sell upholstery fabric by the metre, foam, webbing, staples, staple guns or tools. Those come from a fabric shop or a hardware counter, not from a cover range.
What to buy, and what to leave alone
Upholsterers commonly plan on about 0.5 m of fabric per dining seat when the cloth is 140 cm wide. Pattern matching, thicker padding and a set of several dining chairs all push that figure up. Buy the extra before you cut the first seat. Running out halfway through a matched set is how patterns drift.
Check the fire-safety label on the fabric you buy. Leave the dining chair's original label intact. An ordinary decorative cloth with no label is a poor assumption for a seat people sit on every day, especially in a rented home or a holiday let.
- Screwdriver: Takes out the screws that hold a drop-in dining seat. Keep them in a cup.
- Tack lifter or staple remover: Lifts old fixings without gouging the board. Pliers tear more timber than they save.
- Staple gun and staples: Holds the new cover. A desk stapler will not do this job.
- Sharp scissors: Cut a clean edge. A blunt pair chews the surplus you need at the corners.
- Upholstery-weight fabric: Chosen for a dining chair, not for a cushion that never gets sat on.
- Padding, only if required: Leave sound padding in place. Replace it when the press test showed a collapse.
The piece beginners throw away
The old cover is the cutting template. Ease it off in one piece and keep it flat. If it shreds, you lose the only pattern that already fitted that dining chair.
How Do You Remove the Seat and Strip the Old Fabric?
On most dining chairs the seat is a drop-in pad held by screws under the frame, so you unscrew them and the seat lifts out. A fixed dining chair seat is upholstered onto the frame itself, and that is a much bigger job that many beginners should hand to a professional.
Turn the dining chair over before you buy cloth. Screws through a separate board mean a drop-in seat. Fabric that runs from the seat straight onto the rails, with no loose pad, means a fixed seat. Fixed backs, leather held with decorative nails, and layered historic stuffing all belong in that second group. Do not treat them as a flat board with a new top.
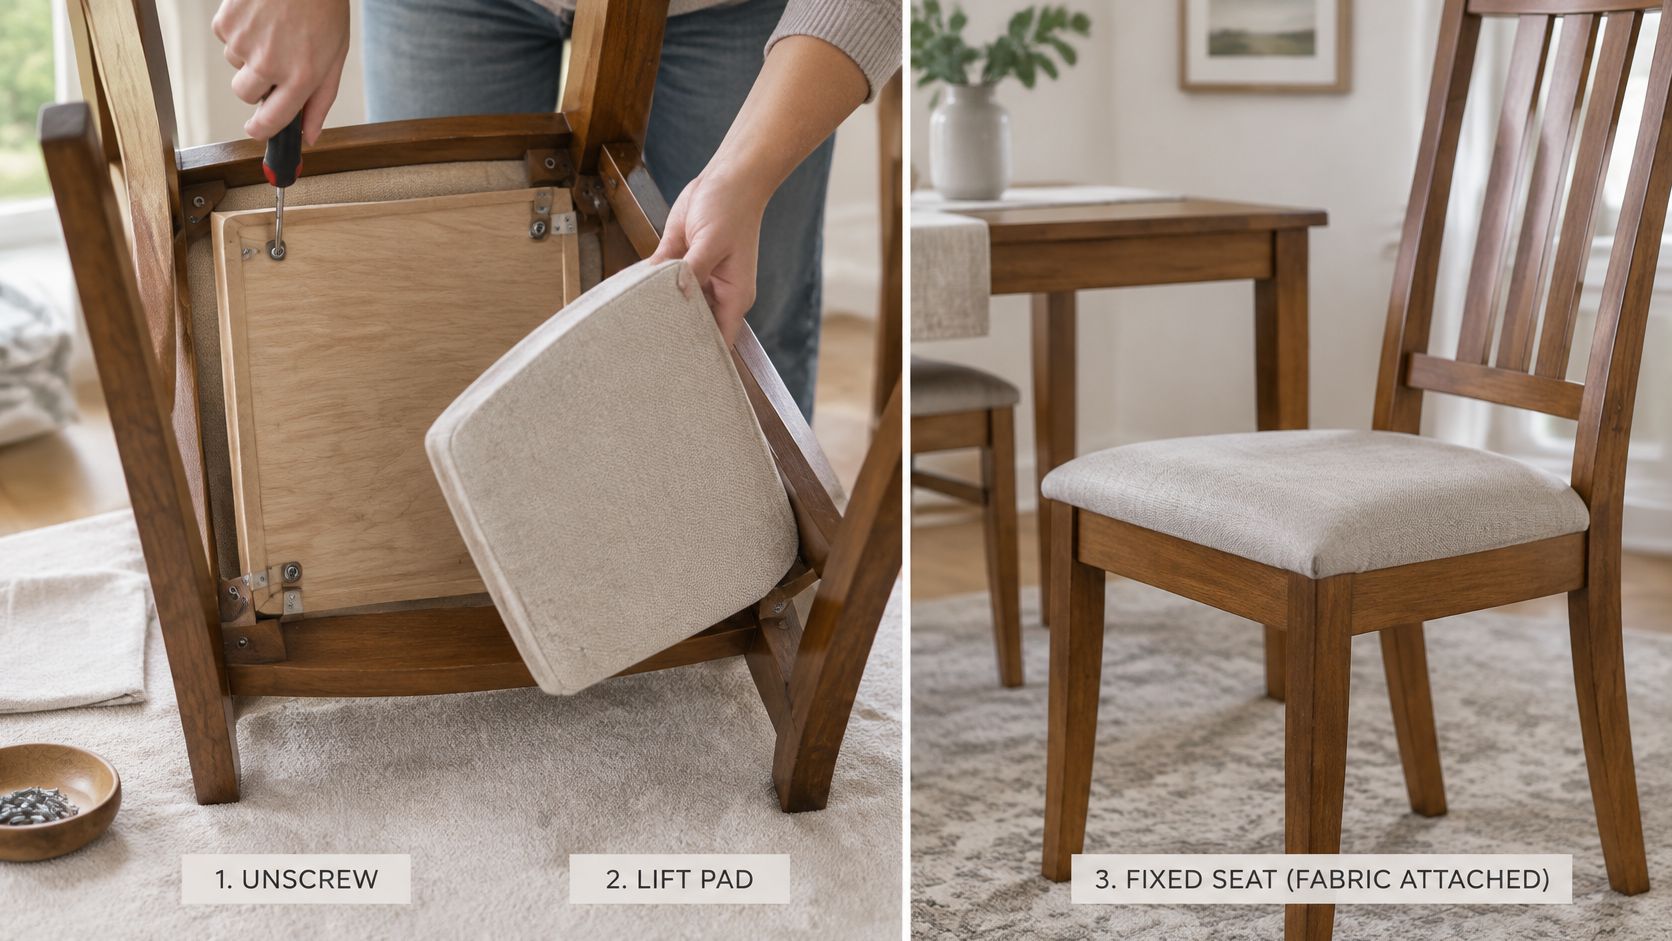
Strip in the order the dining chair was built
Photograph every layer before you lift a fixing, and label what you remove. The dining chair shows you its own rebuild order. Webbing, a base board, padding, a calico or hessian layer, then the top cloth. Put them back in that same order, and only replace the layer that has failed.
Lift staples with a tack lifter. Do not rip the cloth off, because the old cover is your template. With the seat bare, press the padding again. Keep it if it rebounds. Replace it only if it has collapsed or gone hard at the front edge, which is where dining chairs wear first.
Check the timber while it is open. Look for loose joints, splits in the board, and webbing that has snapped or sagged. New fabric over broken webbing feels fine until someone sits down.
On an older dining chair, keep original layers and tack details if the piece has historic value. Photograph, label, and stop if you are unsure. A careful strip beats a fast one.
How Do You Cut and Staple the New Fabric?
Lay the new fabric face down, centre the dining chair seat on it, and cut a generous surplus on every side, with the pattern or grain square to the front edge, before a single staple goes in.
If the old cover survived in one piece, lay it on the new cloth and cut around it, still leaving spare at the edges. If it did not, allow a generous surplus beyond the seat board on every side, enough to pull the cloth under the board and grip it while you fix it. That surplus is what makes a tight seat. Cutting flush with the board is the mistake that leaves you with nothing to pull.
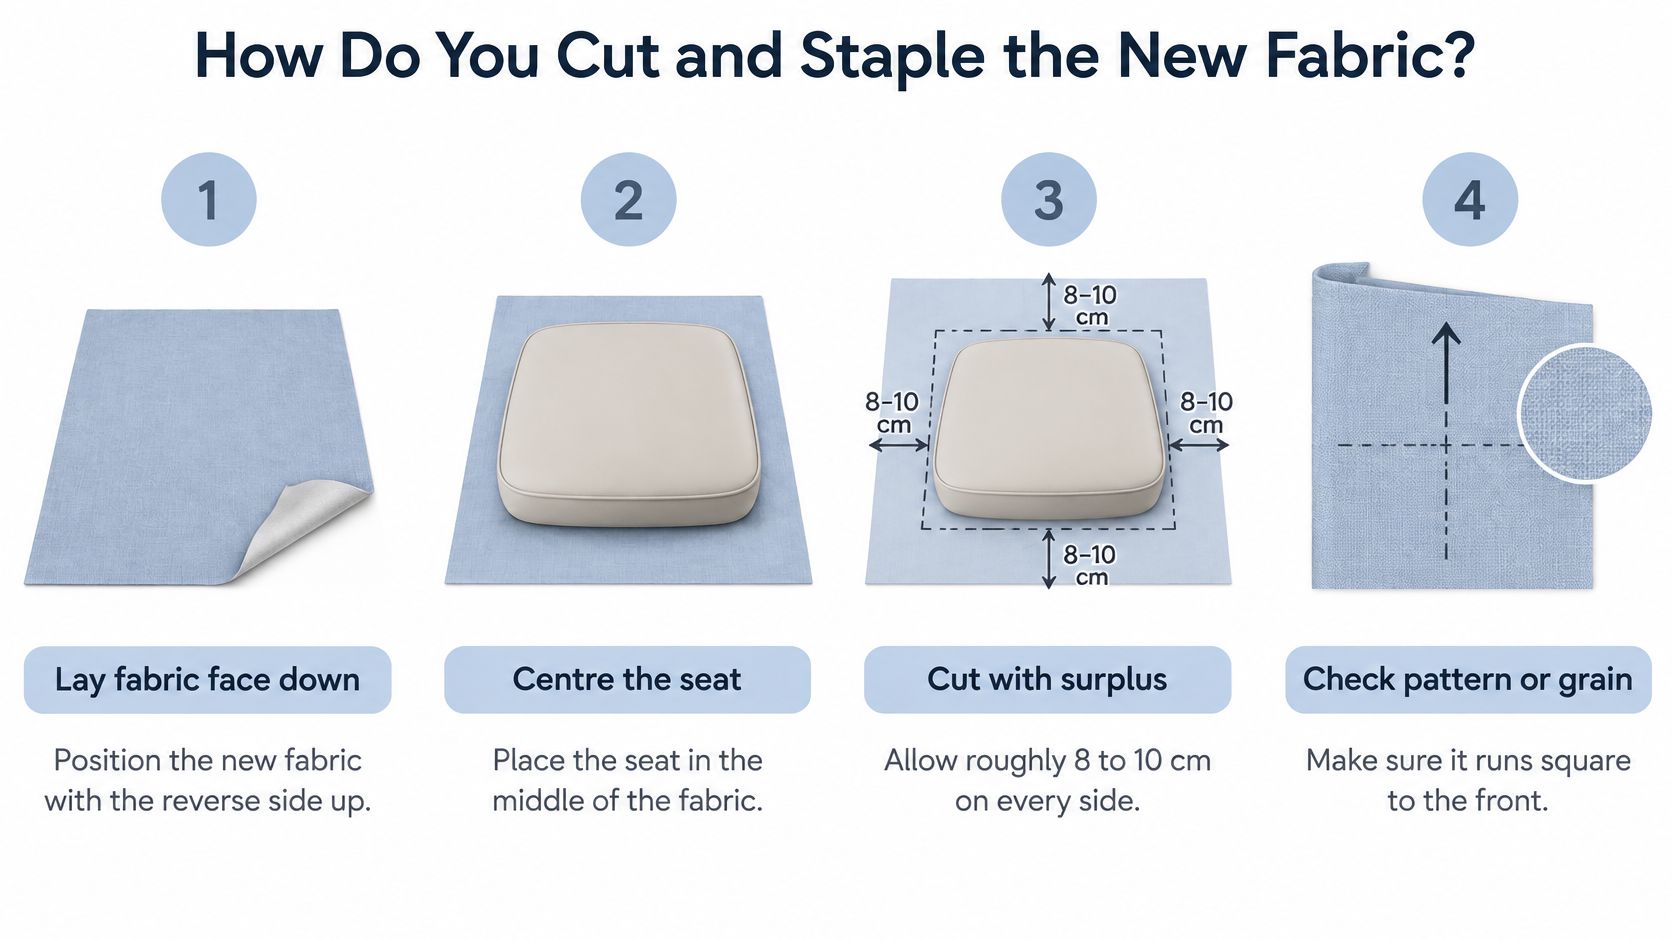
Centre first, corners last
Staple the middle of the front first. Pull the cloth snug, not drum-tight, and staple the middle of the back. Then do the middle of each side. Work outward from those four points, alternating sides, so the spare cloth is pushed evenly toward the corners. Stapling round the edge in one direction drags the weave off grain. You will see it as a diagonal ripple that no extra staple will hide.
Leave the corners until the sides lie flat. Fold the surplus into one neat pleat. Trim the bulk underneath before you fix it, or the corner sits proud and the dining chair will not drop cleanly into the frame. A second pleat on top of the first is almost always too much cloth, not a tidier finish.
Around a back post
Where the cover has to pass a back post, cut a small relief slit in toward the post so the fabric can lie flat. Cut less than you think, then snip a little more. A long slit past the post leaves a raw gap you cannot staple shut. Keep the pattern square to the front edge the whole way. If a stripe twists as you reach the posts, release the side staples and reset from the centre.
The seat is ready to refit when three checks pass. The grain or pattern is square to the front. The corner folds match each other. Pressing the cushion does not reveal a hard frame edge.
How Do You Refit the Seat and Fix Common Problems?
Screw the drop-in dining chair seat back into the frame, then press it and sit on it to confirm the dining chair sits level and nothing rocks or creaks.
Trim spare cloth below the staple line so it cannot snag tights or catch the frame as the seat goes in. If the original had a dust cover on the underside, staple a fresh one over the raw edges. It keeps the underside neat and stops staples scratching the floor when you turn the dining chair over later. Tighten the screws evenly. One side pulled harder than the other makes a level seat look twisted.
What the finish is telling you
Almost every poor result is tension, and tension can be unpicked.
- Diagonal wrinkles: The pull was uneven. Release staples back to the centre of that side and work outward again.
- A lumpy corner: Too much bulk was fixed down. Lift the staples, trim, and refold a single pleat.
- Pattern off grain: The front edge was never set square. Redo it. Living with a drifting stripe is more annoying than restapling.
- A seat that still dips: The padding needed replacing. The cover has to come off again. Staples did not cause that hollow, and more staples will not fill it.
A bad dining chair finish is rarely ruined fabric. It is a row of staples you can lift and place again.
If you would rather add a soft tied pad on top of a sound seat than open the upholstery at all, the method is different from stapling. See dining room chair cushions with ties for that route, and do not mix it up with a full recover.
When Should You Choose a Stretch Chair Cover Instead?
Reach for a stretch cover when the dining chair passes triage: joints tight, seat board flat, padding still comfortable, and only the cloth is stained, worn or dated. It changes the look without staples or sewing, and it comes off again. A cover follows whatever shape is under it, so it will not lift a collapsed seat or calm a wobbly frame.
The no-sew route is still a choice with limits. Check the shape of your chair before ordering, because one stretch pattern will not sit well on every seat shape. For dining chairs, the range centres on the Classic Stretch Chair Cover, in Navy Blue, Cocoa, Black, Beige, Cardinal Red, White and Metal Grey; the decision stays with colour and fit.
Mid-tones are the practical pick beside a dinner table. Pale covers show every mark, and very dark ones show every crumb. Picture the colour against your table top in daylight before you order, because a cover that looks mid-grey online can read darker beside a dark table.
"the metal grey colour looks fantastic in my dining room" — Ruby M., Classic Stretch Chair Cover in Metal Grey
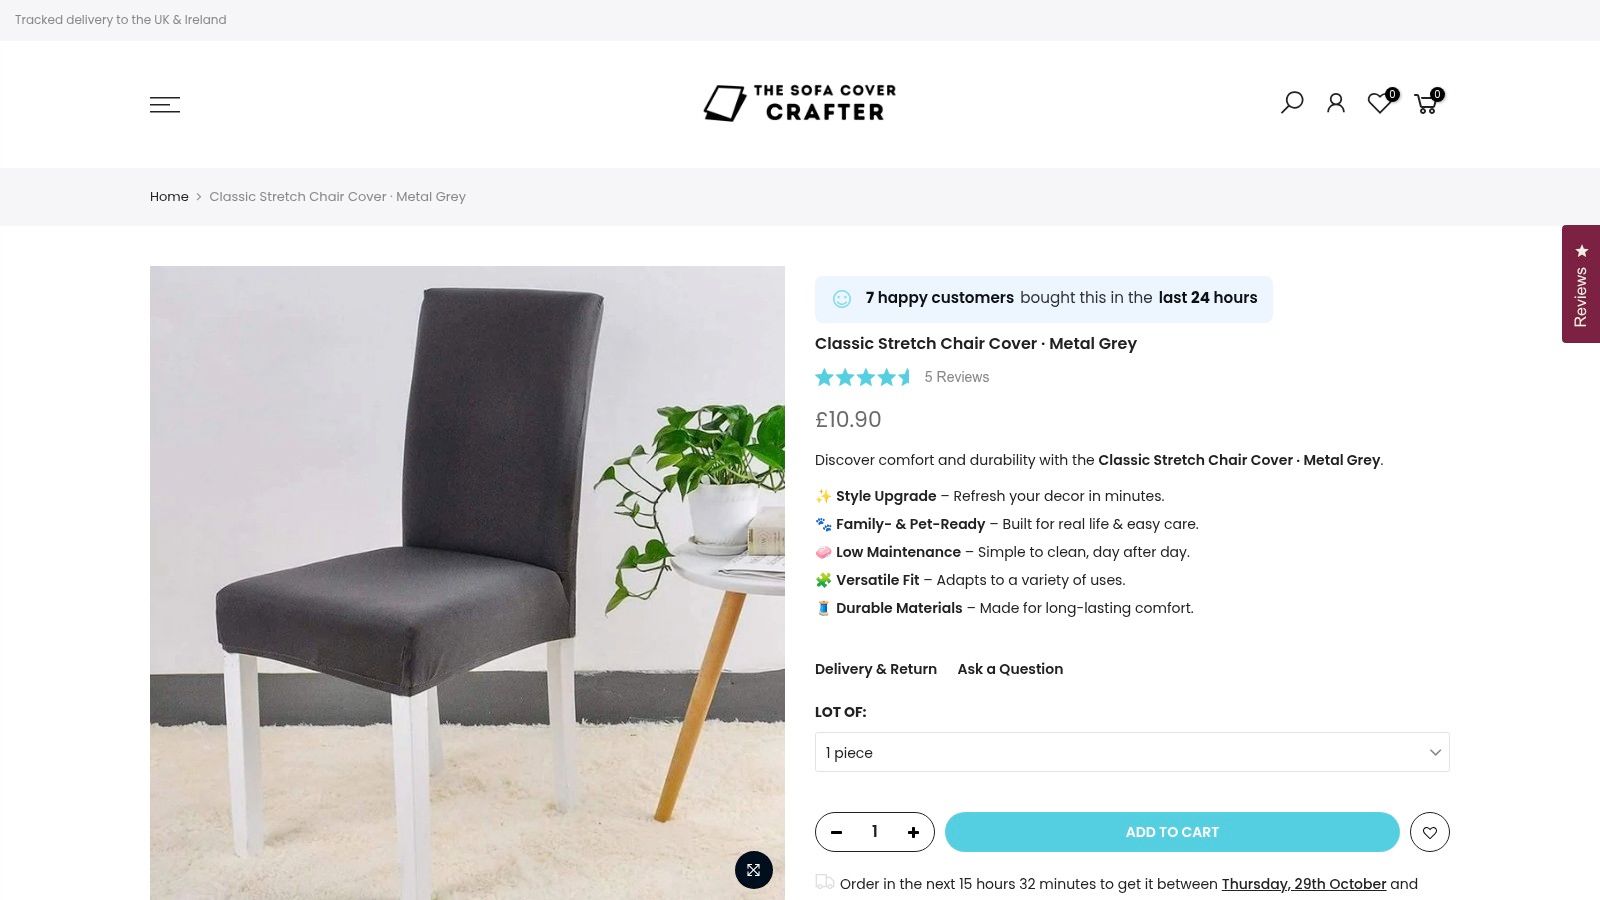
Fitting is its own short job. Follow the stretch chair cover fitting guide rather than guessing at seams and elastic. If the dining chairs are settled and the sofa is the piece that looks tired, use the sofa reupholstering guide linked in the decision section.
Press the dining chair seat before you choose. Comfortable padding and a solid frame point to a stretch cover. A dip, a cracked board or a rocking joint points back to repair, then fabric.
The Sofa Cover Crafter sells stretch dining chair covers for seats whose frame and padding are already sound, alongside covers for other furniture. Compare the colours in our chair covers collection.
