



The absolute secret to learning how to clean a leather sofa properly comes down to two mandatory steps: identifying exactly what kind of leather you’re dealing with first, and then sticking strictly to a gentle, pH-neutral cleaning solution. Getting those two elements right is the difference between a beautifully restored centerpiece and a permanent, costly mistake.
3 Key Takeaways How to Clean a Leather Sofa
Identify Before You Clean: Always do a water drop test first. What safely cleans a standard protected leather can permanently stain absorbent aniline leather.
Keep It Gentle: Avoid harsh chemicals or household hacks like vinegar. A simple, pH-neutral solution made with mild soap and distilled water is your safest and most effective bet.
Cleaning Equals Preservation: Regular, gentle maintenance doesn't just improve looks, it removes abrasive dust and corrosive body oils that cause leather to dry out and crack over time.
Your Essential Guide to a Pristine Leather Sofa
A high-quality leather sofa is often the beating heart of a living room. It's one of those rare, premium pieces of furniture that can actually look better with age, developing a rich patina, but only if you know how to look after it. From the abrasive friction of daily dust to corrosive body oils and the inevitable accidental spill, everyday life takes a toll. This guide cuts through the noise and internet cleaning myths to give you practical, damage-free advice that actually works.
Understanding the right way to clean isn't just about keeping the surface looking nice; it's about long-term preservation. Regular, gentle cleaning removes the invisible build-up of dirt and sweat that slowly eats away at the leather's protective finish. It also prepares the material so you can properly replenish its natural oils, stopping the hide from drying out, cracking, and becoming brittle. Whether you have durable, protected leather or a highly sensitive aniline finish, this kind of proactive care is what keeps your sofa soft, supple, and inviting for years to come.
Why Proper Cleaning Matters
A lot of people are nervous about cleaning their leather furniture, worried they’ll make things worse. It’s a fair concern. Using the wrong products, like harsh household cleaners or acidic solutions like vinegar, can strip the colour and cause damage you can't undo. The key is to always start with the gentlest methods, tailored specifically to your sofa.
A dedicated cleaning routine helps you:
- Extend its Lifespan: Regular cleaning and conditioning are your best defence against cracking and premature ageing.
- Maintain its Appearance: It lifts away the surface oils and dust that can make the leather look dull and flat.
- Improve Hygiene: A clean sofa is healthier for your family, keeping allergens and bacteria from building up.
- Protect Your Investment: Proper care is crucial. The global market for leather cleaners is expected to hit USD 2.3 billion by 2033, which just shows how many people are prioritising the upkeep of their furniture.
If you’re looking for an extra layer of defence, especially in a busy home with kids or pets, adding stylish throws for a leather sofa is a really smart move. They offer great protection while giving you a chance to add a bit of personal flair to your living space.
First, Understand Your Leather Type
Before a single drop of cleaner touches your sofa, you need to play detective. Seriously, identifying your leather type is the single most important thing you'll do in this entire process. Why? Because the cleaning method that works wonders on one type can completely ruin another. Using a heavy-duty cleaner on a delicate, natural hide can lead to discolouration, stiffness, and damage that’s impossible to reverse.
The three main players you'll find in UK homes are protected, aniline, and semi-aniline leather. Each has its own distinct personality and demands a specific approach. Getting this right from the start is the foundation for keeping your furniture looking fantastic for years.
Decoding Your Leather's Finish
Think of it like this: protected leather is wearing a durable raincoat, while aniline leather is in a fine cotton shirt. One repels spills with ease; the other absorbs them in a flash. The difference is all in the finish—or the lack of one.
Here’s a quick rundown of what you’re likely dealing with.
Leather Type Identification and Cleaning Approach
Getting to know your leather is the first step. This table breaks down the three main types you'll encounter, what makes them different, and how that impacts your cleaning strategy.
| Leather Type | Key Characteristics | Best Cleaning Method | Caution Level |
|---|---|---|---|
| Protected (Pigmented) | Uniform colour, feels consistent, has a protective topcoat, most common type. | Gentle, pH-neutral leather cleaner or a mild soap solution. | Low |
| Aniline | Feels incredibly soft, shows natural grain and markings, absorbs liquids instantly. | Specialised aniline-specific cleaner; very minimal moisture. | Very High |
| Semi-Aniline | Softer than protected leather, has a light protective coating, natural look. | pH-neutral leather cleaner, used sparingly. Test first. | Moderate |
As you can see, what works for a tough, protected sofa could be a disaster for a soft aniline one. This is why a quick test is so crucial before you begin.
This simple decision tree shows exactly why identifying your leather is the non-negotiable first step.
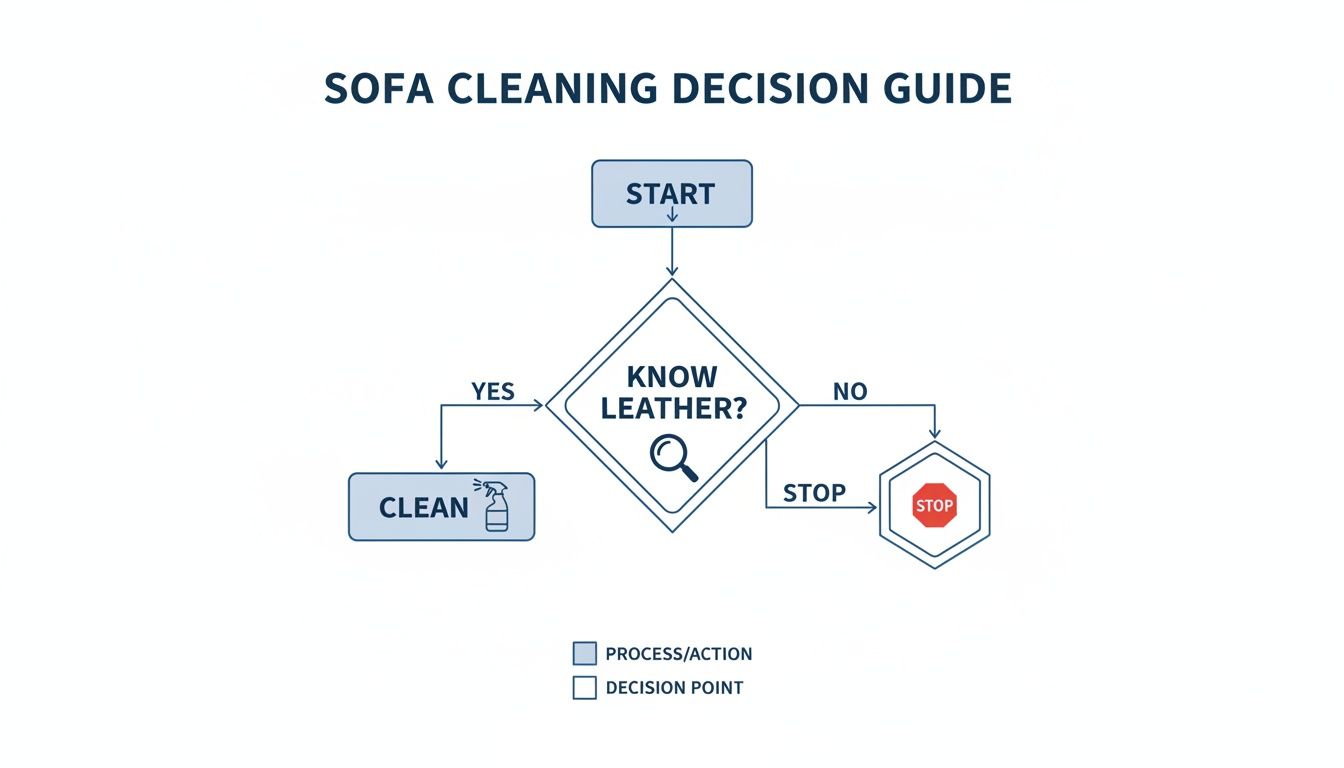
The message is clear: if you don’t know what you’re working with, the safest thing to do is stop and avoid causing any damage.
The Simple Water Drop Test
Not sure which type you've got? There's an easy way to find out. Find a hidden spot on your sofa—on the frame behind a cushion is perfect—and place a single drop of room-temperature water on the surface.
Now, just watch what happens. If the water drop beads up and sits on the surface, you have protected leather. If it soaks in almost immediately and darkens the spot, you're dealing with absorbent aniline leather. If the drop sits there for a moment before it slowly starts to soak in, you likely have semi-aniline leather.
This little test tells you everything you need to know. A sofa that repels water can handle a standard, gentle clean. One that drinks it up needs an extremely delicate touch, specialised cleaners, and the absolute minimum amount of moisture. Knowing the difference is what separates a successful clean from a very costly mistake.
Your Go-To Method for a General Clean
For a routine refresh, the best way to clean a leather sofa doesn’t involve harsh chemicals or complicated machinery. It’s all about a gentle, consistent approach that lifts away the daily grime and keeps the material looking its best. Think of this as your core action plan for maintaining that fresh, inviting feel.
First things first, you need to get rid of any surface debris. Dust, crumbs, and pet hair can be surprisingly abrasive, and rubbing them into the leather as you clean can cause tiny micro-scratches. The easiest way to avoid this is by giving your sofa a thorough vacuum.

Grab the soft brush attachment—never a hard plastic nozzle—and pay close attention to the seams, crevices, and the areas underneath the cushions. This simple step preps the surface for a deeper, yet still gentle, clean.
Mixing Your Gentle Cleaning Solution
You really don't need an expensive, specialised product for a routine wipe-down, especially on protected leather. A simple, pH-neutral solution you can mix yourself is incredibly effective and perfectly safe.
Here's my go-to recipe:
- Mix a few drops of mild, non-alkaline soap (like Dove or a simple washing-up liquid) into a bowl of lukewarm distilled water. I always suggest distilled water because the minerals in regular tap water can sometimes leave a residue.
- Give it a little stir until you see a few suds, but don't go overboard and create a thick foam. The goal is slightly soapy water, not a bubble bath.
This DIY approach is fantastic because it’s gentle enough not to strip the leather's natural oils. It just cuts through the light layer of grime and body oils that build up with regular use.
Crucial Tip: Always, always do a spot test before you apply any cleaning solution to the whole sofa. Find an inconspicuous area, like the back or the underside of a cushion, apply a tiny amount, and let it dry completely to make sure there's no discolouration.
The Correct Application Technique
With your solution ready, the technique you use is everything. You must never saturate the leather. The key is to use a damp cloth, not a wet one.
Dip a clean, soft microfibre cloth into your soapy water and wring it out until it’s barely damp. Working in small, manageable sections, wipe the leather using gentle, circular motions. This method is great for lifting the dirt without pushing it deeper into the grain.
I always recommend starting at the top of a cushion or an arm and working your way down. This just prevents any dirty drips from running onto areas you’ve already cleaned. After cleaning a section, immediately follow up with a second, clean microfibre cloth that’s been dampened with plain distilled water to wipe away any soap residue.
Finally, take a third, completely dry microfibre cloth and gently buff the area. This last step is vital for preventing water spots and streaks, leaving you with a uniform, clean finish. For general maintenance, a lot of the same principles and professional leather cleaning techniques used for car interiors can be applied just as effectively to your sofa.
How to Tackle Common Stains Like a Pro
Spills happen. It doesn’t matter how careful you are; a splash of coffee or a dropped biscuit can leave you staring at a potential stain. The key to winning this battle is a combination of speed and the right technique. Acting fast is what stops a minor accident from becoming a permanent mark on your beautiful sofa.
The golden rule for any spill is to blot, never rub. Rubbing a stain, especially a liquid one, just grinds it deeper into the leather's pores and spreads the mess over a larger area. Your first move should always be to grab a clean, dry cloth or paper towel and gently dab the spill, working from the outside in to stop it from spreading.
This quick response is far more necessary than you might think. A recent poll of British households found that three-quarters have stained sofas, with tea, coffee, chocolate, and wine being the usual suspects. Worryingly, instead of cleaning them, 20% of people just hide the marks with cushions, which can let bacteria multiply. You can find more details in this revealing study on sofa hygiene.
Dealing with Greasy Marks
Grease stains from things like pizza, crisps, or even the natural oils from hair and skin are incredibly common. They leave a dark, oily patch that can look really intimidating, but there’s a simple and effective home remedy that works wonders.
Bicarbonate of soda is your best friend here. Sprinkle a generous amount directly onto the greasy mark until it's completely covered. Now, you just have to be patient and let it sit for at least a few hours—or even overnight if you can. The powder will slowly draw the oil out of the leather. Afterwards, just brush it all away with a soft brush.
Pro Tip: For a really stubborn greasy spot, you might need to repeat the process. Don't be discouraged if it doesn't vanish on the first go. The goal is to gently absorb the oil, not to scrub it in.
Banishing Fresh Ink Stains
An accidental pen mark can feel like a complete disaster, but if you catch it while it’s fresh, you can often lift it out with minimal fuss. Your tool for this job is a simple cotton bud and a little bit of isopropyl (rubbing) alcohol.
Dampen the very tip of the cotton bud with a small amount of rubbing alcohol—be careful not to soak it. Gently dab at the ink, being extremely careful to stay within the lines of the stain itself. You’ll see the ink begin to transfer onto the cotton bud. Use a clean part of the bud for each dab to avoid smearing the ink back onto the leather.
Once the ink is gone, wipe the area with a cloth dampened with distilled water and then dry it thoroughly. Keep in mind that older, set-in ink stains are a completely different story and often require a professional. Similarly, if you notice scratches alongside a stain, it's worth checking out our guide on repairing scratched leather before you start tackling the discolouration.
When to Call in the Professionals
While DIY methods work brilliantly for many common stains, it’s just as important to know your limits. Certain substances need expert knowledge and equipment to remove them without ruining your leather.
Consider calling a professional for:
- Old, set-in stains that have had time to penetrate deep into the leather.
- Stains from dyes, like the kind that transfers from new jeans or a colourful throw.
- Large or widespread spills, especially of dark liquids like red wine or coffee.
- Stains on delicate aniline leather, which is highly absorbent and very easily damaged.
Trying to tackle these yourself can sometimes make the problem much worse. A professional has access to specialised products and techniques that give you the best chance of restoring your sofa without causing any harm. Protecting your investment sometimes means letting an expert take the lead.
Scratches fading and early dryness
Pet scratches vary. Light surface scuffs can sometimes look less obvious after gentle conditioning because the leather regains a more even appearance. Deeper claw marks are another matter. They usually need repair rather than cleaning.
If your sofa has taken a few scratches, this guide on repairing scratched leather is worth keeping handy before you decide whether it’s a DIY job or one for a specialist.
Fading usually points to placement, not cleaning failure. The arm nearest the window or the top edge catching afternoon sun will often change first. Moving the sofa slightly, adjusting blinds, or rotating loose cushions can help stop one side ageing faster than the other.
Early dryness shows up as a rougher feel, a flatter appearance, or fine surface lines where people sit most often. That’s your signal to condition, not to scrub harder.
Most sofa damage comes from good intentions applied too forcefully.
If a stain has gone beyond the surface, or if the leather has become tacky, brittle, or discoloured after a DIY attempt, stop there. Professionals can often stabilise a problem that repeated home treatments would only deepen.
Minor scratches and scuffs
Surface wear doesn’t always need a full restoration. Small marks often improve with careful handling.
Light surface scratches
Buff gently with a dry microfiber cloth first. Sometimes the mark is just displaced surface oil and friction will reduce it. If the area still looks pale or rough, condition lightly and reassess once dry.
Slight scuffs on protected leather
Use a leather repair cream or colour-matched product only after testing it in a hidden spot. Apply sparingly. Build up gradually rather than trying to fix the whole mark at once.
When to stop
If the scratch has cut through colour, exposed a rough edge, or split the surface, that’s no longer basic maintenance. At that point, use a proper repair method or hand it over to a specialist.
This internal guide on repairing scratched leather is a solid starting point if your sofa has gone beyond simple buffing.
The Secret to Soft and Supple Leather
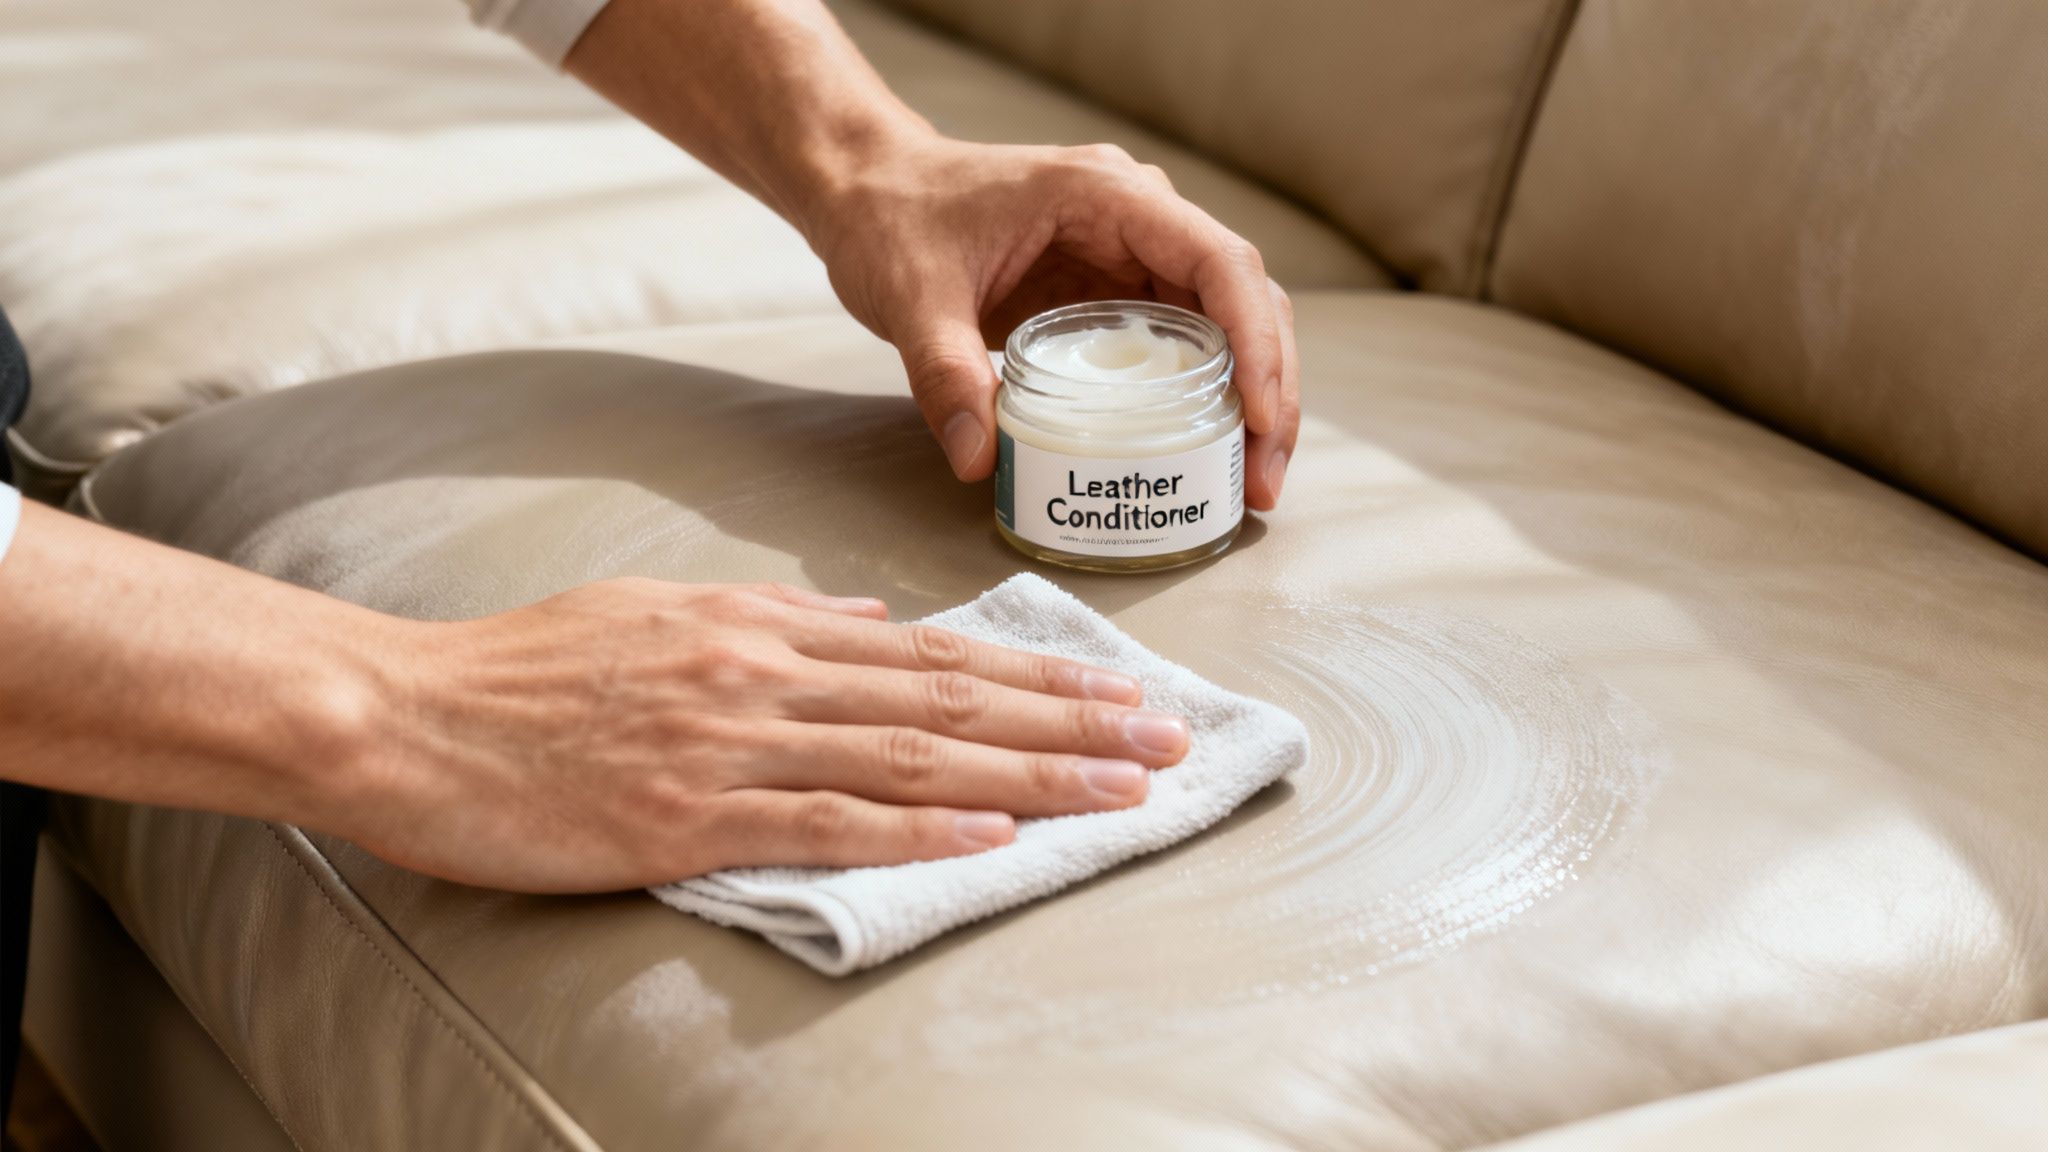
Cleaning your sofa gets rid of the surface grime, but conditioning is what really keeps it going for the long haul. Think of it like this: cleaning is the wash, and conditioning is the moisturiser. This step is absolutely crucial because it puts back the natural oils within the leather, keeping it flexible, soft, and much less likely to develop ugly cracks over time.
Especially after a deep clean, some of those essential oils can get lifted away along with the dirt. If you skip conditioning, you're leaving the leather vulnerable and practically asking for it to dry out. A simple conditioning routine every six to twelve months is arguably the most important part of keeping your leather sofa in top shape.
Choosing the Right Conditioner
The conditioner you choose makes a massive difference. You’re looking for a product designed to penetrate and nourish from within, not something that just sits on the surface looking shiny.
There are a few ingredients you should actively avoid:
- Silicones: These create an artificial-looking barrier that essentially seals the leather, stopping it from being able to breathe.
- Waxes: A bit like silicones, waxes can build up on the surface, which ends up attracting more dirt and creating a sticky, unpleasant residue.
- Petroleum Distillates: These are harsh solvents that can strip the leather's natural finish and cause serious long-term damage.
Instead, your best bet is always a dedicated, water-based leather cream or conditioner. These are specially formulated to be absorbed easily, delivering moisture right where it’s needed most without clogging the pores of the material.
Key Takeaway: The goal is to hydrate the leather from the inside out, not to coat it. A quality conditioner should leave the surface feeling soft and nourished, not greasy or overly slick. This is the real secret to maintaining that luxurious, supple feel for years.
The Correct Application Method
Applying conditioner is a pretty straightforward process, but getting the technique right ensures an even, effective result. Always, always start with a sofa that is completely clean and dry.
Grab a clean, soft microfibre cloth and squeeze a small, coin-sized blob of conditioner onto it—never apply it directly to the sofa. Work the product into the leather using gentle, overlapping circular motions. Imagine you're massaging lotion into the hide.
Work in small, manageable sections, like one cushion or one armrest at a time. This helps you get a nice, even coat and stops you from accidentally missing any spots. Give the conditioner at least an hour to fully absorb into the material.
Once it has soaked in, take another clean, dry cloth and gently buff the entire surface. This little step removes any slight excess and brings out a beautiful, natural lustre. It's this simple routine that is your ticket to keeping that leather soft and supple for years to come.
A practical conditioning calendar for UK homes
General advice often gives one schedule for everyone. Real homes don’t work like that.
- More absorbent leather in heated or dry rooms usually needs closer attention.
- Protected leather in stable rooms can often go longer between treatments.
- Homes with radiators running for long stretches need more vigilance on arms, top rails, and seat fronts.
- Damp properties still need conditioning, but lighter applications matter because heavy product can sit on the surface.
A useful rule is to inspect more often than you condition. If the leather still feels supple and even, leave it alone. Conditioning is support, not a weekly cosmetic ritual.
Building a Simple Weekly and Monthly Care Routine
The weekly jobs that stop damage building up
The weekly task is simple. Remove dust, crumbs, and grit before they get rubbed into the surface by everyday use. Weekly dusting with a microfibre cloth removes up to 80% of surface dirt that leads to abrasion, and immediate spill blotting prevents 90% of potential stains by stopping liquid from penetrating, according to this leather sofa maintenance guide.
That matters most on armrests, seat fronts, and head-height areas. Those are the spots where people touch the sofa constantly without realising it. Skin oils, food residue, and fine grit collect there first.
A strong weekly routine usually looks like this:
- Dry dust first. Use a clean microfibre cloth and work across the arms, seat tops, backs, and piping.
- Vacuum the creases gently. A soft brush attachment lifts crumbs from seams without scratching.
- Blot spills as they happen. Use a dry white cloth. Press, don’t rub.
- Check problem zones. The favourite seat, the arm nearest the lamp, and anywhere pets perch need a quick look.
Missed crumbs matter more than most people think. They get pressed into the leather every time someone sits down.
The monthly reset that keeps leather looking settled
Monthly care is lighter than a deep clean. Think of it as a reset rather than a scrub. Use a leather-safe cleaner only when the surface looks slightly grubby or feels tacky from use. Apply it to a cloth, not directly onto the sofa, and work in small areas.
For most homes, that’s enough to keep the finish looking even. In high-traffic rooms, you may need to pay closer attention to the arms and seat fronts than the rest of the sofa. Don’t over-clean untouched areas just because you’ve got the product out.
Here’s a practical guide you can follow:
| Care Task | Protected/Pigmented Leather | Aniline/Semi-Aniline Leather | High-Traffic Home (Pets/Kids) |
|---|---|---|---|
| Dry dusting | Weekly | Weekly | Weekly, with extra attention to arms and seat fronts |
| Vacuum creases | Weekly or as needed | Weekly or as needed | Weekly |
| Spill response | Immediately, blot only | Immediately, blot only | Immediately, then check again once dry |
| Light wipe-down with leather-safe cleaner | Monthly or when soiled | Less often and very gently | Monthly, focused on contact areas |
| Conditioning | Follow product guidance after leather type check | Follow product guidance after leather type check | Watch for early dryness in the most-used zones |
The trade-off is straightforward. Gentle, regular maintenance takes a few minutes. Ignoring the sofa means stains set, oils build up unevenly, and the finish starts looking patchy.
Protecting Your Sofa for the Long Haul
While knowing how to clean a leather sofa is a must, the best maintenance strategy is always the one that stops the damage from happening in the first place. A few smart habits can dramatically cut down on wear and tear, keeping your sofa looking its best with a lot less effort on your part.
Something as simple as where you put your sofa can make a huge difference. Constant, direct sunlight will inevitably fade the colour and dry out the leather, which is a fast track to premature cracking. In the same way, placing it right next to a radiator or fireplace will have the same damaging effect. A little bit of thoughtful furniture arranging goes a very long way.
Smart Protection for Busy Homes
In a home with young kids or pets, a bit of extra defence is a very wise move. Protective throws and stylish covers are brilliant for safeguarding against spills, scratches, and the general rough-and-tumble of daily life. They act as a practical barrier without forcing you to compromise on your living room's aesthetic.
Choosing the right cover is key to blending protection with style. You want a material that complements the leather's feel while offering robust defence. Our guide to the best slipcovers for leather couches can help you find the perfect match for your home and lifestyle.
Smart Protection for Rentals and Family Homes
Standard leather-care advice usually assumes the same people use the sofa every day and treat it with reasonable care. That’s not how many UK homes work. In furnished rentals, shared houses, holiday lets, and busy family lounges, the sofa has to survive constant turnover, unpredictable habits, and very little downtime between uses.
The challenge is real. In the UK, 22% of households are private renters, and guidance discussing leather care for landlords often misses the practical problem of guest turnover and between-stay stain management, as noted in this discussion of leather furniture care and rental-related concerns.
Why high-traffic homes need a different strategy
If you’re managing a property, the pressure isn’t just wear. It’s timing. You may have only a short window to check, clean, air the room, and get everything guest-ready again. Families have a different version of the same issue. Life moves fast, so prevention tends to work better than constant rescue.
That’s where protective planning makes sense. Not because leather is fragile, but because the surface that gets damaged first is usually the visible one. If you can reduce direct contact with food spills, pet claws, denim dye, and repeated friction, you keep the actual sofa in better condition for longer.

In high-use homes, the smartest care often happens before the mess, not after it.
Where covers make practical sense
A washable cover won’t replace cleaning and conditioning, but it can reduce how often the leather itself needs attention. That’s especially helpful on seat cushions, corner sections, and the one armrest everyone uses.
There are trade-offs. A cover changes the feel of the sofa slightly, and some people prefer the look of bare leather. But in homes with children, pets, tenants, or frequent guests, the practical upside is hard to ignore. You can remove the layer that gets most of the wear, wash it, and keep the leather underneath from taking every hit directly.
For pet-heavy households, this guide to a sofa protector for pets offers a sensible starting point when you’re weighing up protection against appearance and ease of cleaning. The Sofa Cover Crafter also offers fitted sofa covers that add a washable layer over seating, which can help reduce everyday wear on leather in busy homes.
Covers versus throws
Both can work, but they solve slightly different problems.
| Option | Best use |
|---|---|
| Fitted sofa cover | Full-surface protection and a tidier appearance |
| Throw | Quick protection for one seat, one arm, or a pet perch |
| Layered setup | Throw on top of a fitted cover for very heavy use homes |
For leather, I usually prefer a solution that stays put. Sliding fabric creates its own friction and constant rearranging gets old fast.
Knowing When to Call in a Professional
There are times when even the most diligent home care just isn’t enough. For those deep-set stains, widespread discolouration, or any damage you’re not confident tackling, calling in a professional is the safest and most effective option. Trying a DIY fix on a serious issue can often make things much worse.
The UK's upholstery cleaning market is growing fast for a reason, with experts advising a professional clean annually, or even every six months for homes with pets. With the market expected to hit USD 5.98 billion by 2030, it’s a trusted service for maintaining big-ticket furniture investments. A professional clean for a 2-3 seater sofa can range from just £40-£70 – a small price to pay for expert results. You can read more about the growth of these specialised services.
Balancing regular home maintenance with the occasional expert deep clean is the real secret to ensuring your leather sofa remains a beautiful and comfortable centrepiece for years to come.
What a specialist should still tell you
Even when you hire a pro, the aftercare remains basic. Regular leather couch conditioning every 6 to 12 months is foundational in UK care and prevents 80 to 90% of cracking and drying issues according to this maintenance guide. A good technician won’t just clean the sofa. They’ll tell you how to stop the same wear pattern returning.
Hiring without guessing
Use a simple filter when comparing services:
| What to ask | Why it matters |
|---|---|
| Do they work specifically on leather upholstery? | General cleaners often use the wrong products |
| Can they identify the leather finish first? | The method should follow the material |
| Do they offer testing before treatment? | Spot testing protects colour and finish |
| Do they explain aftercare clearly? | Good work fails quickly without proper follow-up |
If you manage furnished lets, it also helps to read broader cleaning process breakdowns. This professional cleaning guide is about property turnover rather than leather alone, but the framework is useful for deciding when a job is routine cleaning and when it needs specialist handling.
Your Leather Sofa Care Questions, Answered
Even when you know the basics, looking after a quality piece like a leather sofa can bring up a few questions. Let's clear up some of the most common queries we get.
How Often Should I Be Cleaning My Leather Sofa?
For general upkeep, a light dusting or a quick vacuum with a soft brush attachment once a week is a great habit to get into. This stops dust and grit from working their way into the leather's grain and acting like sandpaper over time.
As for a proper, deeper clean with a dedicated leather solution, aim for every three to four months. Of course, if you have kids or pets, you might find yourself needing to do it a bit more often.
Is It Okay to Use Vinegar on My Leather Sofa?
It’s best to keep the vinegar in the kitchen for this one. While it’s often hailed as a do-it-all DIY cleaner, its acidic nature is far too harsh for leather.
Over time, vinegar will strip the natural oils from the material. This leads to dryness, discolouration, and eventually, cracking. A pH-neutral soap solution is a much safer, gentler bet.
Our Pro Tip: Keeping a leather sofa in top condition is all about maintaining its natural moisture balance. Harsh chemicals like vinegar throw that balance completely out of whack, which is why we always recommend specialised or very mild, pH-neutral cleaners for long-term health.
Is a Leather Conditioner Really Necessary?
Absolutely, yes. Think of it this way: cleaning removes the dirt and grime, but conditioning puts the good stuff back in. It replenishes the essential moisture that keeps the leather feeling soft and supple.
Without it, the material will inevitably dry out, become brittle, and start to crack. It's like a moisturiser for your furniture, a completely non-negotiable step after every deep clean if you want to prevent premature ageing.