



Trying to keep your fabric sofa looking fresh can feel like a juggling act. Over the years I’ve discovered that blending targeted spot treatments, occasional deep cleans every 6–12 months and fast drying really keeps fibres springy and stains at bay. Of course, your first port of call should always be a quick glance at the care label—each code tells you whether water or solvent is the way forward.
Key Takeaways Best Way To Clean Fabric Sofa With Proven Upholstery Tips
- Check the fabric code first: W means water-based cleaner, S means solvent-based, WS means either, X means vacuum only.
- Follow a three-step cycle: Spot check, deeper clean, then a thorough dry.
- Match the method to the fabric: A linen-look weave may need vacuuming only, while microfibre can take a wet sponge.
Table of Contents
- Key Takeaways Best Way To Clean Fabric Sofa With Proven Upholstery Tips
- Quick Overview Of Cleaning Fabric Sofa Methods
- Comparison Of Sofa Cleaning Methods
- Benefits Of This Approach
- Identifying Fabric Types And Care Labels
- Decoding Manufacturer Codes
- Sofa Fabric Cleaning Codes At a Glance
- Spot Testing And Solution Selection
- When To Call Professional Cleaners
- Spot Cleaning For Common Stains
- Quick Stain Treatment Guide
- Tackle Coffee And Tea Marks
- Remove Red Wine And Berries
- Deal With Ink Spills
- Handle Oil And Grease
- Clean Pet Accidents With Enzymes
- Test Before You Treat
- Know When To Pause
- When To Call A Pro
- Deep Cleaning Methods And Eco Friendly Options
- Eco Friendly Cleaning Options
- Renting Vs Buying Equipment
- DIY Plant Based Foam Cleaner
- Professional Techniques And Maintenance
- Preventive Care And Future Touches
- Machine Washing Removable Covers
- Check Care Label And Fabric
- Preventing Shrinkage And Wear
- Trouble Spots And When To Call Professionals
- Give Your Covers Space to Clean
- When Hand Washing Is the Only Way to Go
- Drying Maintenance And Prevention Tips
- The Professional Secret to a Perfect Fit
- Increasing Airflow With Fans And Dehumidifiers
- Weekly Vacuuming And Brushing Routine
- Applying Fabric Protectant Sprays
- Seasonal Strategies For Peak Condition
- Maintenance Schedule Comparison
- Regular Inspection Tips
- Common Questions About Sofa Cleaning
- How Often To Deep Clean
- Homemade Mixes For Fabrics
- Neutralising Stubborn Odours
- When To Call Professional Help
- Can I Use Fabric Softener on My Spandex Cover?
- My White Sofa Cover Is Looking a Bit Dingy. Is It Safe to Bleach It?
- Help! My Sofa Cover Shrank. What Do I Do?
- What's the Best Way to Get Rid of Pet Hair Before Washing?
Quick Overview Of Cleaning Fabric Sofa Methods
Whether you’re dealing with spilled coffee or pet mishaps, a clear plan makes all the difference. Start by matching the type of stain to the right approach, then follow up with a routine that restores and protects.
- Pair coffee, red wine or food marks with a stain remover designed for that exact spill.
- Check your fabric code (W, S, WS or X) before choosing water-based or solvent-based cleaners.
- Slot in a deep clean every 6–12 months to pull out embedded grime.
- Boost airflow after cleaning with a fan or dehumidifier to stop mould from taking hold.
Here’s a handy decision guide that walks you through spot checks, deeper cleans and drying.

This visual breakdown shows when to swoop in with a quick spot fix, when a full refresh is due and why a thorough dry finish locks in the results.
Comparison Of Sofa Cleaning Methods
Below is a snapshot of three core routines and how they stack up.
| Method | Suitable For | Average Time | DIY Friendly |
|---|---|---|---|
| Spot | Fresh spills | 5–10 mins | Yes |
| Deep | Full-sofa refresh | 45–60 mins | Moderate |
| Dry | Post-clean prevention | 10–15 mins | Yes |
Even a simple three-part cycle can make a world of difference to a fabric sofa’s lifespan.
Benefits Of This Approach
- Swift action on fresh spills prevents stubborn stains.
- Scheduling regular deep cleans revives tired-looking fabric without harsh chemicals.
- A thorough dry stage stops mould and odours in their tracks.
- This adaptable routine works on cotton, polyester and velvet alike.
Keep it straightforward and you’ll protect your sofa—and your sanity—at the same time.
Identifying Fabric Types And Care Labels
Before you grab any cleaner, take a moment to figure out what you’re really dealing with. A splash of juice on a sturdy cotton blend behaves far differently than on a plush velvet in your formal sitting room.
- Cotton blends often bear W or WS codes and shrug off mild, water-based cleaners.
- Velvet piles usually carry an S tag or “Dry Clean Only” warning—solvents are their friend, water is not.
- Microfibre is your stain-resistant champion, almost always welcoming WS treatments.
- Leather-look fabrics stamped X must stick to vacuuming—no liquid whatsoever.
Use the quick table below whenever you need a refresher on fabric codes and cleaning approaches.
Fabric Types And Recommended Cleaning Methods
Description: Comparison of common upholstery fabrics and approved cleaning approaches
| Fabric Type | Cleaning Code | Recommended Method |
|---|---|---|
| Cotton Blend | W or WS | Water-based clean with mild detergent |
| Velvet | S | Solvent spot treatment in a hidden patch |
| Microfibre | WS | Water rinse and gentle blotting |
| Leather-look | X | Regular vacuum only |
With this handy chart in your back pocket, you’ll spot the right method at a glance.
Decoding Manufacturer Codes
Each letter on your sofa’s care label is a simple signal.
W fabrics tolerate gentle water-based solutions—perfect for tackling fresh spills without risk.
On the other hand, S-coded textiles demand a solvent-based cleaner, like rubbing alcohol applied sparingly.
Labels marked WS grant you both water and solvent options, giving you a little extra flexibility.
Finally, X means strictly vacuum only—keep liquids well away to protect the fibres.
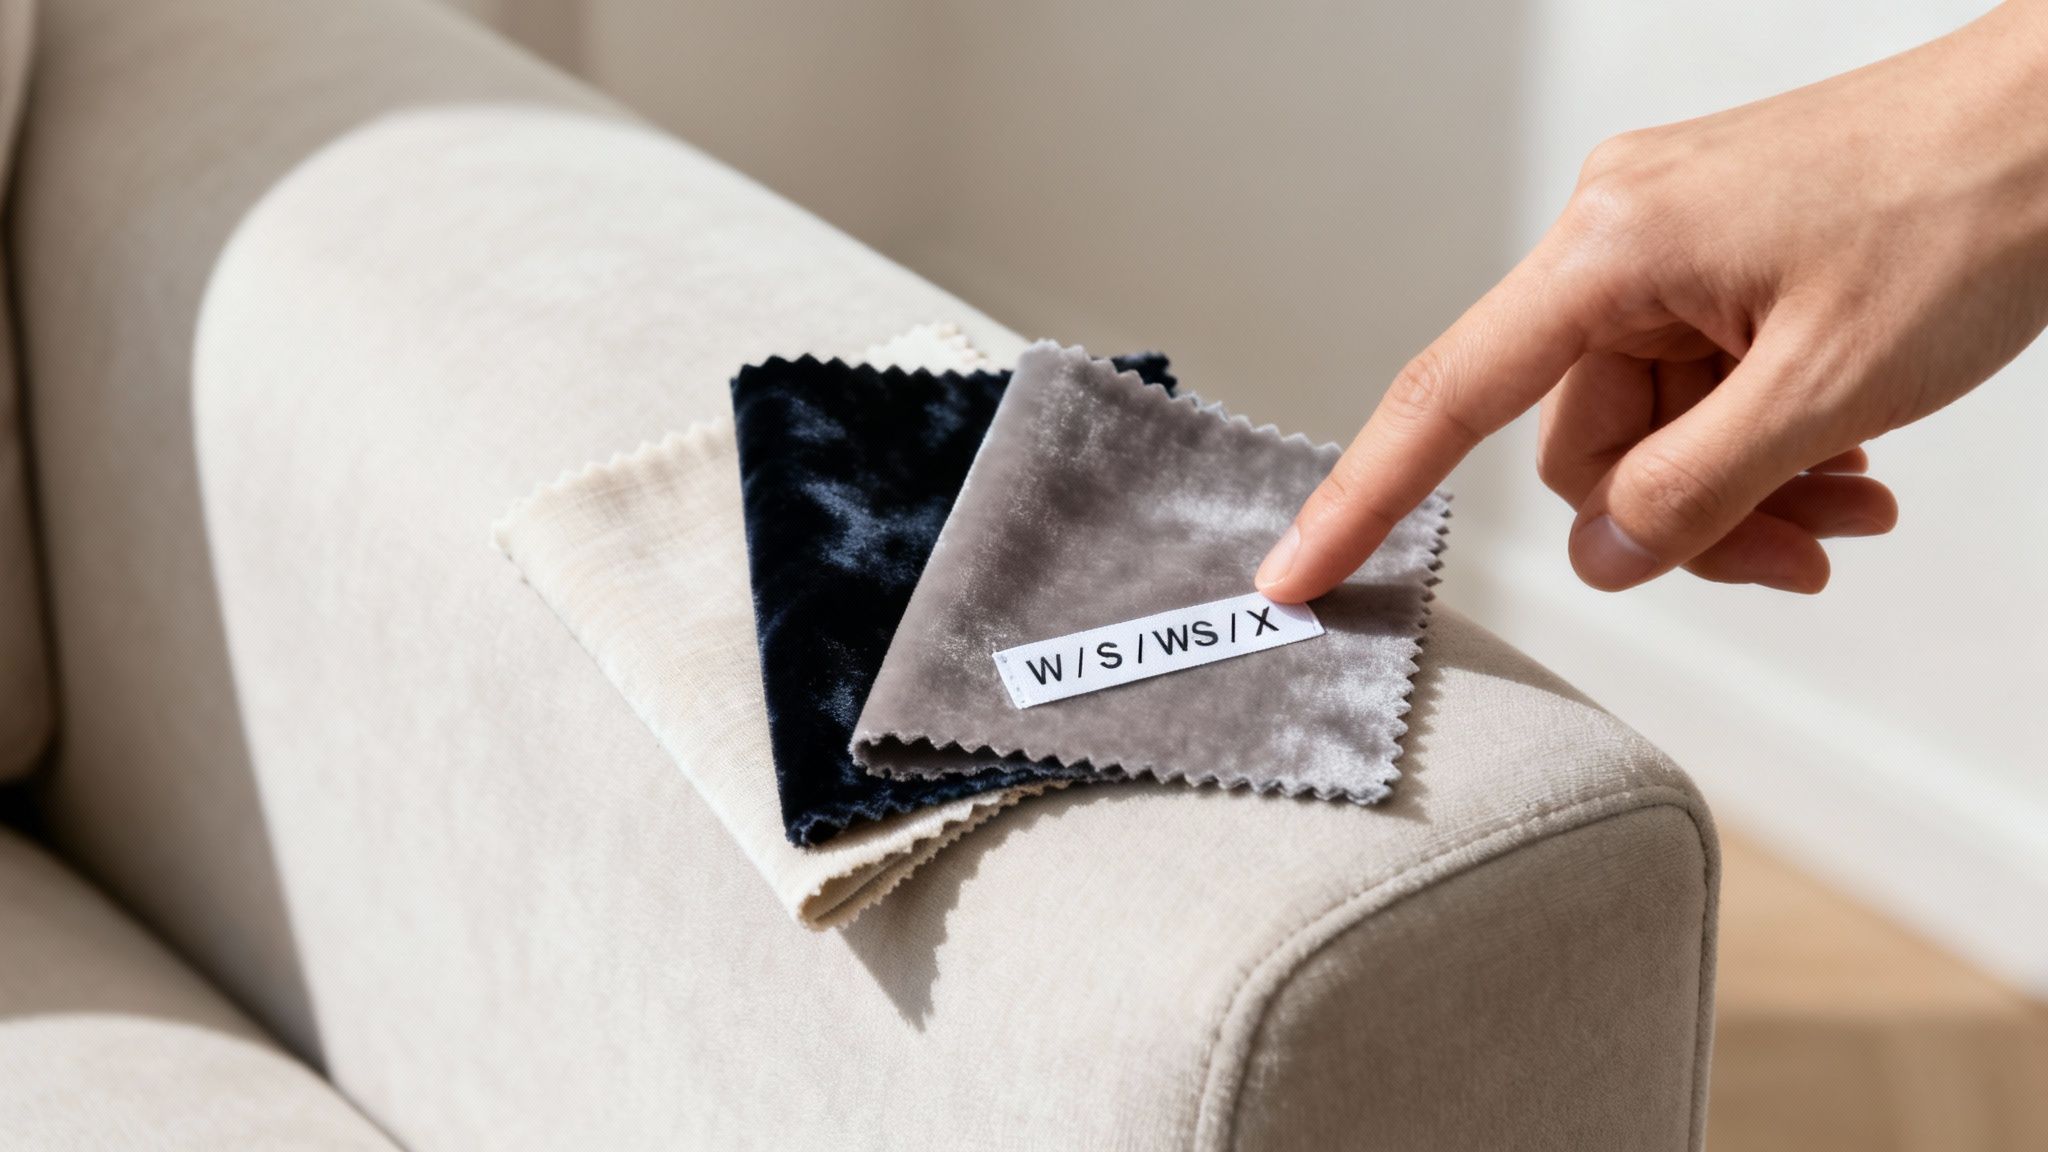
For instance, that linen-look weave in your countryside cottage might only survive a thorough vacuum, whereas a family-room microfibre could handle a wet sponge and mild soap. Professional cleaners will always test in a hidden corner first, avoiding unpleasant dye runs or texture changes. That kind of spot-on testing means you choose the right product from the get-go, sparing you set-in water rings or solvent smudges.
Sofa Fabric Cleaning Codes At a Glance
| Code | Meaning | Recommended Cleaning Method |
|---|---|---|
| W | Water-Based Cleaner | Use water and gentle, water-based upholstery shampoos. |
| S | Solvent-Based Cleaner Only | Use a water-free, dry-cleaning solvent. Do not use water. |
| W/S | Water or Solvent Cleaner | Either method is acceptable, but a spot test is crucial. |
| X | Vacuum Only | Do not use any liquid cleaners. Only vacuuming and light brushing are safe. |
This table neatly sums it up. Match the code on your sofa to the right method, and you’re already halfway to a successful clean without any mishaps.
This flowchart also simplifies the decision-making process based on the code you find.
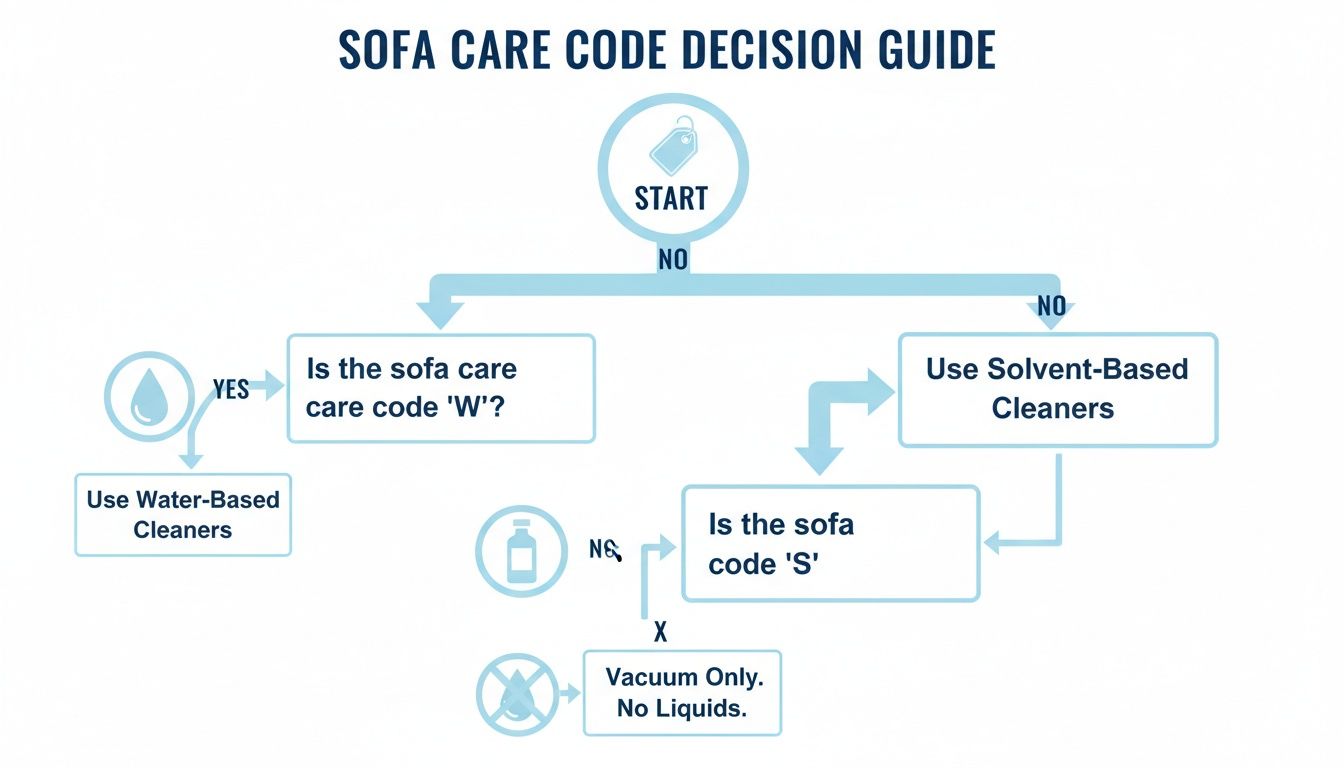
As you can see, identifying your sofa's specific code is the critical first move before you even think about what kind of cleaner to use.
Spot Testing And Solution Selection
Real pros never dive in blind. They apply a tiny dab of cleaner beneath a cushion seam, then wait 10–15 minutes for any reaction.
Always test in a hidden area to catch unexpected reactions before they spread.
Once the swatch looks good, decide on water or solvent based on the code—then follow these simple moves:
- Blot stains gently rather than rubbing, so fibres stay intact.
- Work from the stain’s edges toward its centre to keep the mess contained.
- Rinse any soap residue with a damp cloth, avoiding overwetting.
After each blot, check that the fabric isn’t soggy and let it air dry fully. This measured approach tames most stains long before you need a full-scale deep clean.
If your sofa has removable covers labelled machine-washable, take them off and run a gentle cycle. Shape them back to form while they’re damp, then let them finish drying on a flat surface. Always peek for internal stitching or clip-on details before tossing anything in the wash.
When To Call Professional Cleaners
Sometimes DIY just won’t cut it. Tough grease, set-in red wine, or pet odours that lurk deep in the pile often demand enzyme-based pro treatments. Large sofas with non-removable covers can overwhelm home gear, and antique or high-value fabrics need guaranteed safe handling.
- Grease or oil stains that resist household degreasers
- Timeworn sofas coated in years of grime and dust
- Complex patterned upholstery where spotting repairs is tricky
- Heirloom pieces that call for the utmost care
Knowing when to dial in the experts can save you time and keep your sofa safe from DIY mishaps.
Check out our guide on the best fabric for sofa covers to choose fabrics that suit your lifestyle and cleaning plan.
Regular label checks and careful spot tests build your confidence. With a clear understanding of codes and methods, you’ll tackle spills and maintenance like a seasoned pro—protecting your fabric sofa investment for the long haul.
Spot Cleaning For Common Stains
Accidents happen—especially on a beloved fabric sofa. Act fast: blotting that coffee spill within 5 minutes can mean the difference between a clean couch and a permanent mark. Use a white paper towel, pressing gently from the edges toward the centre to guard the fibres.
Keep these pantry-powerhouse mixes to hand:
- A 1:1 blend of 250 ml club soda and water for most fresh spills
- 1 tsp white vinegar mixed with 2 tsp mild dish soap to tackle stubborn stains
- A paste of baking soda and water for those greasy patches
More often than not, these simple solutions outperform retail cleaners in under five minutes.
Quick Stain Treatment Guide
| Stain Type | Recommended Treatment | Important Note |
|---|---|---|
| Coffee/Tea | Blot immediately, then dab with a 50/50 mix of white vinegar and water. | Avoid using hot water, as it can set the tannin stains. |
| Red Wine | Blot, then cover with a generous layer of salt to draw out the liquid. Vacuum off. | For stubborn stains, a specialised wine remover is your best bet. |
| Grease/Oil | Dab with a small amount of washing-up liquid on a damp cloth. | Don't use too much water, which can spread the grease mark. |
| Mud | Let it dry completely first, then scrape or vacuum off the excess. | Treating wet mud will just smear it deeper into the fabric. |
This table is just a starting point, but it shows how having the right approach for the right stain makes all the difference.
Never underestimate the power of a quick response. A study of household cleaning habits showed that stains treated within the first hour have a significantly higher chance of being removed completely compared to those left for 24 hours.
After applying your chosen treatment, let it sit for a few minutes before gently blotting it away with a clean, damp cloth. For more in-depth advice tailored to specific fabrics and really stubborn marks, you can explore our complete guide on how to remove stains from your sofa. Taking this proactive step ensures your main wash is all about overall freshness, not fighting old battles.
Tackle Coffee And Tea Marks
Warm, soapy water is unbeatable against coffee and tea. Dip a clean microfiber cloth into your detergent solution and dab—never rub—to coax the liquid out of the weave.
After about five dabs, switch to a damp cloth to rinse away soapy residue. This keeps your fabric looking natural and prevents any dull, chalky finish.
Remove Red Wine And Berries
Red wine and berries can be ruthless on velvet or cotton. Immediately blanket the area with kitchen salt to pull up excess moisture. Next, mist a white vinegar-and-water mix, pause for a moment, then blot until the red tint lifts.
“Salt buys you precious time to tackle deep pigments before they embed,” says cleaner Sam Duncan.
Finish by dabbing with clear water and leaving the sofa to air dry.
Deal With Ink Spills
Ink loves to wander, so contain it at once. Saturate a cotton ball with rubbing alcohol and tap lightly on the spot, rotating to a fresh side with every press. If traces remain, a quick spritz of high-alcohol hair spray can help—just blot immediately afterwards.
- Target the edges first to keep the ink from spreading
- Work gradually toward the centre for maximum control
- Use minimal liquid to avoid over-saturating the fabric
Handle Oil And Grease
Greasy spots call for a dry-first approach. Generously cover the stain with baking soda and let it sit for 15 minutes—the powder draws out the oil like a magnet. Once dry, vacuum or brush away all residue before applying any wet treatments.
From my experience, breaking the process into bite-sized actions ensures nothing gets overlooked:
• Sprinkle on baking soda and leave it to do its work
• Remove every last speck of powder
• Work in a mild dish soap solution
• Rinse with just enough water to moisten
• Blot dry and let the spot cure for 30 minutes
Clean Pet Accidents With Enzymes
Pet mishaps need a two-pronged attack: stain removal and odour control. Gently scrape off any solids, then spritz an enzyme cleaner designed for organic spills. Blot with a clean cloth until the area feels damp, not drenched.
Prefer a DIY mix? Combine 100 ml water with 10 ml white vinegar and a drop of mild dish soap. Lightly mist the stain and dab until it’s nearly dry.
| Stain Type | DIY Mix | Average Time |
|---|---|---|
| Coffee & Tea | Water + dish soap | 5–10 mins |
| Red Wine | Salt + vinegar solution | 10 mins |
| Ink | Rubbing alcohol | 5–7 mins |
| Grease (Oil) | Baking soda paste | 15 mins |
| Pet Messes | Vinegar + soap + enzymes | 10–15 mins |
Test Before You Treat
Every fabric reacts differently, so always trial your chosen cleaner in a hidden corner. Wait 10–15 minutes for any change in colour or texture.
If the test patch looks perfect, you’re good to go. If not, switch to a gentler formula that suits your sofa’s care code.
Key Takeaway
“Spot-testing prevents unwelcome surprises and keeps your fabric looking its best,” advises Sam Duncan.
Know When To Pause
It’s tempting to scrub until you’re blue in the face, but overworking a wet area can fray fibres and spread residue. After one pass, let the fabric rest for 30 minutes. This pause allows moisture to disperse, making a second, lighter treatment more effective.
When To Call A Pro
Some spills dive too deep for home remedies—think set-in red wine or heavy grease. Professionals carry industrial-grade enzymes and safe solvents that household kits can’t match.
Antique or fixed-cover sofas also benefit from specialist care to avoid irreversible damage. If a stain persists after two careful treatments, it’s time to reach out for expert help.
Deep Cleaning Methods And Eco Friendly Options

Nothing breathes new life into a tired fabric sofa like a proper deep clean. Whether you’re using a rented machine shampooer or a low-moisture foam process, the aim is the same: pull out weeks of grime without drenching the frame.
Across the UK, savvy homeowners favour plant-based detergents over harsh chemicals and fine-tune water pressure to avoid saturating padding. The result? A sofa that looks fresher and dries faster.
- Rent vs Buy: Choose hire equipment if it’s a one-off; invest in a machine for regular upkeep
- Machine Settings: Match water temperature and pressure to your fabric’s care code
- Low-Moisture Foam: Ideal for delicate weaves that can’t stand heavy soaking
- Biodegradable Cleaners: Break down naturally and leave no synthetic residue
Fine-tuning the water flow is crucial. Too much moisture invites mould and warping, so extraction must be as precise as the shampooer’s settings. Foam systems use up to 50% less water, slashing drying times – a boon for busy households or flats with limited ventilation.
Eco Friendly Cleaning Options
Plant-based surfactants work a bit like enzymes in your laundry—cutting grease and oils right at the molecular level. They’re safe around little ones and pets and eliminate any worry about chemical residue.
Recent research shows 60–68% of new fabric cleaners boast biodegradable or plant-derived ingredients. Plus, 60% of UK consumers say they’d pay a little extra for greener alternatives. Find more on these sustainable trends here.
“Enzymes unlock deep-set dirt without compromising fibre integrity,” explains a technician from a London upholstery service.
Key eco-friendly cleaning ritual:
- Pre-treat stubborn marks with a plant enzyme spray
- Work in low-moisture foam using gentle, circular strokes
- Agitate lightly with a soft brush to lift embedded soil
- Extract every trace of foam with a suitable machine
Finally, rinse sparingly with clear water to avoid soapy streaks, then blot with clean towels.
Pros often customise their own blends—adding mild alkalis or tweaking foam density after spot-testing in a hidden seam. This tailored approach respects each fabric’s unique weave and weight.
Renting Vs Buying Equipment
Deciding whether to hire or own your cleaning gear comes down to frequency and storage.
| Option | Cost Range | Best For | Storage Need |
|---|---|---|---|
| Renting | £20–£30 per day | Infrequent deep cleans | Minimal |
| Buying | £80–£200 | Regular maintenance | Dedicated space |
Renting lets you test high-end machines without a big commitment. Owning pays off if you’re planning a deep clean every six to twelve months. Always do a quick moisture check under a cushion before you start—too much water can warp frames.
DIY Plant Based Foam Cleaner
You don’t need a shop-bought product to get into eco mode. Try this simple mix:
- 150 ml warm water
- 10 ml castile soap
- 5 ml eco-friendly enzyme solution
Shake well in a spray bottle, mist the sofa, then leave it for 5 minutes. Agitate lightly with a soft brush and let the foam dry before vacuuming away any residue.
Drying gets a boost from a low-speed fan or dehumidifier, speeding things up by up to 30%.
“DIY solutions work best when matched to your fabric’s care code and fibre density,” says upholstery expert Rachel Finch.
Quick safety checks:
- Always test in an inconspicuous area first
- Never drench delicate fabrics like velvet or silk blends
- Respect each material’s recommended drying time
A properly executed deep clean not only refreshes padding and fabric but also cuts down on frequent spot-treatments, extending your sofa’s life. Aim for a thorough service once a year, or twice if your home sees heavy traffic.
Professional Techniques And Maintenance
Seasoned technicians swear by a two-stage routine: an initial lift with foam, followed by hot-water extraction to flush out every last particle. They’ll often add plant surfactants at 2–4% concentration to boost cleaning power gently, while low-pH formulas keep colours bright and prevent shrinkage.
After extraction, a light mist of protector spray repels spills, trimming future cleaning time by up to 20%. If you have removable stretch covers—like those from The Sofa Cover Crafter—always double-check care labels. Many need a gentle machine wash rather than heavy-duty shampooing.
Opting for eco-friendly methods means a safer living space and a sofa that looks great, year after year.
Preventive Care And Future Touches
A final spritz of plant-based fabric protector after deep cleaning adds a shield against everyday mishaps—spills bead up and dust brushes off in seconds.
Embrace these eco-savvy habits regularly and you’ll find your sofa stays fresher, longer, with fewer full-scale cleans on the horizon.
Machine Washing Removable Covers
By the time everyday spills, dust and pet fur settle in, your sofa covers deserve a spa day. Most UK sofas come with zip-off cushion and arm covers designed for home laundering—if you know the tricks.
Before you swing by the laundry room, unzip each cover slowly and feel along the seams. You’ll spot hidden snaps or elastic loops that must be secured before they tangle or tear.
Check Care Label And Fabric
Your first stop is the care label. Symbols like W or WS point you to the right temperature, detergent type and washing method.
Next, sort your covers by shade. Darker fabrics should never share the drum with paler ones; mesh bags are a simple safeguard against dye runs.
Mixing whites with colours can result in permanent staining, warns upholstery pro Hannah Ward.
Here’s how to prep your machine:
- Zip covers fully and slip them into separate mesh bags
- Close Velcro tabs or snaps to prevent snagging
- Choose a gentle, eco-friendly detergent—especially for sensitive weaves
- Set the spin to low to cut down on wrinkles
Once everything’s in place, pick the ideal cycle:
- Gentle Wash at 30°C for cotton blends
- Delicate or Wool Cycle at 20°C for stretch spandex
- Rinse Only for lightweight jacquards—skip the detergent for minimal abrasion
Preventing Shrinkage And Wear
High heat and fast spins are the enemy of fabric elasticity. A cool cycle and slow spin protect both stretch and shape.
As soon as the wash ends, lay covers flat on a drying rack. This keeps seams straight and allows air to circulate evenly.
In my workshop, we always tag each cover set with a laundry label. That way, every cushion slips back into the right place—no more mismatched seats.
Fabric Care Summary
| Fabric Type | Temperature | Cycle Type | Drying Method |
|---|---|---|---|
| Cotton Blend | 30°C | Gentle Wash | Flat on rack |
| Spandex Stretch | 20°C | Delicate Cycle | Flat with clips |
| Jacquard Texture | 30°C | Rinse Only | Air dry horizontal |
Avoid overloading the drum, which leads to tangled covers and spotty detergent coverage. Mid-cycle, peek in and unknot any stuck pieces for a smoother finish.
Trouble Spots And When To Call Professionals
Some stains—oil drops, red wine or ink—can fight back. If the care label reads “Dry Clean Only”, pack your covers off to a specialist.
Similarly, oversized slipcovers for corner sofas may not squeeze into a household washer. In those cases, locate a local service that handles bulky textiles safely.
Check out our guide on machine-washable sofa covers at The Sofa Cover Crafter to explore cover options and detailed care tips.
Finally, clean your machine drum after each load to clear lint and residual detergent. A monthly rinse cycle with plain water alone keeps your washer running smoothly.
Aim to wash removable covers every three to six months. Sticking to this schedule prevents oil and dust build-up while avoiding over-washing that can fade or weaken fibres. If you notice loose threads or dullness, switch to a pH-neutral detergent or try a gentle steam refresh before calling in the pros.
Give Your Covers Space to Clean
One of the most common mistakes is overloading the washing machine. It’s tempting to cram all the covers in at once to get it done, but this is a bad idea. Overcrowding stops the water and detergent from circulating properly, which leads to a patchy, uneven clean.
Wash your sofa covers in a load by themselves, separate from other laundry. If you have a large set of covers, you might need to split them into two smaller loads. This makes sure each piece has enough room to move, resulting in a much more thorough and consistent wash.
This principle is crucial for all sorts of materials. For example, if your removable sofa covers are made from something like microfibre, you can find proven methods for how to clean microfiber that also stress the importance of not overcrowding the machine.
Remembering these simple guidelines will help you maintain the look and feel of your sofa for years. For more tips on keeping your sofa looking its best, explore our guide to machine-washable sofa covers for easy cleaning.
When Hand Washing Is the Only Way to Go
For the more delicate fabrics—think heavily textured jacquards, velvets, or anything with fancy embellishments—hand washing is the only safe bet. It gives you total control and avoids the mechanical stress of a machine. All you need is a clean bathtub or a large basin.
Fill the tub with cool water and add just a small amount of mild detergent. Submerge the cover and gently squeeze the soapy water through the fabric, then let it soak for about 30 minutes. There’s no need for any vigorous scrubbing.
After it’s soaked, drain the tub and rinse the cover with cool, clean water until all the suds are gone. Gently squeeze out the excess water, but never, ever wring or twist the fabric. That’s a surefire way to stretch it permanently out of shape. The same principles apply to other large household fabrics; for instance, learning how to wash drapes properly also involves careful handling to prevent damage.
Before you start any wash, though, pre-treating stains is key. This handy graphic breaks down the simple steps to take.

Tackling stubborn marks first means your main wash, whether by hand or machine, can focus on getting the whole cover fresh and clean rather than fighting a losing battle against set-in stains.
Drying Maintenance And Prevention Tips
Getting your sofa bone-dry after cleaning isn’t optional—it’s the difference between fresh upholstery and a mouldy nightmare. A gentle breeze or a dehumidifier can do wonders when used right.
Take a low-speed fan tucked under loose cushions. It quietly draws moisture from the fabric without turning your living room into a dust storm. Pair that with a dehumidifier and you’ll yank dampness straight out of the fibres.
The Professional Secret to a Perfect Fit
Here’s a game-changing tip that we swear by for getting that flawless, wrinkle-free finish every single time. Once the cover is about 90% dry but still has a slight coolness or dampness to it, it's time to put it back on the sofa.
Refitting your cover while it's still slightly damp is the ultimate trick. As the fabric finishes drying in place, it will naturally shrink just that tiny bit needed to mould perfectly to the contours of your furniture. It pulls taut, eliminating wrinkles and giving you that tight, custom-fitted look.
This final step makes a huge difference, turning a good cleaning job into a great one. While broad market reports on the upholstery cleaning service are interesting, it's these practical, hands-on tips that really give homeowners the best results. The real value is in the small details that professionals use every day.
Increasing Airflow With Fans And Dehumidifiers
Position a fan about 0.5–1 metre from the sofa. On low speed, you can slash drying time by 50% if you let it run for roughly 2–3 hours.
For steam removal, a dehumidifier rated for 20–30 m² rooms keeps humidity under 60%, which traps mildew before it even thinks about settling in.
- Lean back cushions upright against a wall to open up air channels.
- Keep an eye on moisture with a simple hygrometer—under £10—and catch damp spots before they spread.
Weekly Vacuuming And Brushing Routine
A quick vac and brush once a week stops dust and pet hair getting a permanent foothold.
- Vacuum under every cushion to lift settled debris.
- Run a soft-bristle brush over seams to dislodge particles gently.
- Rotate cushions each week to avoid dents and uneven wear.
- Wipe armrests and headrests with a lint-free cloth to clear oils and grime.
These small habits can reduce intense spot treatments by up to 20%, keeping your sofa ready for a deeper clean down the line.
Applying Fabric Protectant Sprays
A reliable spray coats fibres with an invisible barrier that repels spills and speeds up dry times—many formulas set in under 10 minutes.
- Pick a spray designed for W or WS fabrics.
- Test in a tucked-away corner, wait 15 minutes, then go full cover.
- Hold the can around 30 cm away for even misting.
- Top up protection every 3–6 months or after a major clean.
These treatments also slow down fade from sunlight—handy if you’ve guests or furry friends in for the day.
Seasonal Strategies For Peak Condition
Every season demands its own short maintenance burst:
- Winter: Low humidity can dry out fibres—consider a humidifier if your home’s too arid.
- Spring: Pollen sneaks into weave—vacuum more often to stop yellowing.
- Summer: Draw curtains during peak sun to avoid UV damage.
- Autumn: Sweep off leaves and ash from fireplaces before they stain.
Industry reports show regular professional cleaning boosts sofa lifespan by 20–30% compared to random spot fixes. Find more on UK upholstery trends here.
You might be interested in our guide on pet couch protectors, which shows how washable covers can shield your upholstery from muddy paws and fur. Read our recommendations on pet couch protectors at The Sofa Cover Crafter pet couch protector guide.
“Annual professional care can extend sofa lifespan by up to 30%, saving replacement costs over time,” says upholstery specialist Sarah Mills.
For stubborn odours, deep-set pet stains or warped frames, it pays to call in the pros. Their tools and know-how will revive even the most tired fabric. Aim for a pro check-up every 12 months, or sooner in busy households, to keep your sofa feeling—and looking—like new.
Maintenance Schedule Comparison
| Task | Frequency | Benefit |
|---|---|---|
| Airflow Check | After cleaning | Reduces drying time by 30% |
| Vacuum & Brush | Weekly | Prevents dust embedding |
| Protectant Spray | Quarterly | Repels spills up to 24 hours |
| Professional Service | Annually | Extends lifespan by 20–30% |
Regular Inspection Tips
Scan seams and stitching each month for loose threads or frays. A quick stitch-up or fabric patch stops a small flaw turning into a tear.
Deal with minor damage straight away—fabric repair kits or simple sewing can save you hefty reupholstery bills down the line.
Combine these drying and maintenance pointers with your routine deep clean, and your fabric sofa will stay fresher, live longer and continue to look its best.
Common Questions About Sofa Cleaning

Cleaning a fabric sofa without wrecking the weave or inviting musty odours is a common worry. Here, I’ve turned years of spills, pet mishaps and midnight snack disasters into clear, hands-on advice you can actually use.
How Often To Deep Clean
Giving your sofa a professional-style deep clean every six to twelve months keeps fibres resilient and free of hidden grime. In homes with kids or furry friends, I recommend a four-month cycle to stay ahead of allergens. That way you avoid the dreaded buildup—and the mammoth spot-treating sessions that follow.
Homemade Mixes For Fabrics
Before reaching for harsh chemicals, try these reliable DIY blends tailored to your sofa’s fabric:
- Wool Blends: Mix 50 ml of mild soap into 150 ml of warm water.
- Cotton & Polyester: A 1:1 solution of vinegar and water effortlessly lifts coffee splashes or fruit juice stains.
- Delicate Weaves: Lightly mist with water, then blot—always pat, never rub.
Neutralising Stubborn Odours
Whether it’s pet accidents or lingering smoke, tackling odours at the padding level is essential. Start by blotting away any moisture, then spray a gentle vinegar-water mist and let it dry naturally. Positioning a compact dehumidifier nearby can slash drying time by about 30%.
Regular aeration and a quick fan blast on low speed can cut odour recapture in half.
When To Call Professional Help
Some marks become part of the fabric’s history—think dark red wine rings or set-in curry stains. If two careful DIY attempts haven’t lifted the spot, it’s time to bring in an enzyme-based professional service. These experts use targeted solvents that break down grime at a molecular level, leaving no sticky residue behind.
Ready to protect your sofa from spills and stretch your décor budget? Discover The Sofa Cover Crafter for machine-washable covers at The Sofa Cover Crafter
Can I Use Fabric Softener on My Spandex Cover?
Honestly, it’s best to steer clear of fabric softener for any kind of stretch-blend sofa cover. Softeners leave a coating on the elastic fibres, which over time, makes them less stretchy and leads to that dreaded saggy, loose fit. A good quality, mild detergent and a cool wash are all it really needs.
Using fabric softener on spandex is one of those common mistakes that can permanently ruin its ability to hug your sofa. To protect that perfect, snug fit you bought it for, just stick to gentle detergents.
My White Sofa Cover Is Looking a Bit Dingy. Is It Safe to Bleach It?
The first thing you must do is check the care label. Most covers simply can’t handle harsh chlorine bleach—it will damage the fabric, sometimes irreparably.
If the label does give you the green light for whitening, make sure you use a non-chlorine, oxygen-based bleach. A much safer first step, though, is to pre-soak the cover in a solution of cool water and a specialised, upholstery-safe whitening agent.
Help! My Sofa Cover Shrank. What Do I Do?
This is a classic fear, and it nearly always comes down to one thing: too much heat in the wash or the dryer. If you find your cover is a bit too snug after washing, don't panic. The best fix is to put it back on the sofa while it’s still slightly damp.
That little bit of moisture gives the fabric more elasticity, letting you gently stretch it back into place as you fit it over the frame. Work methodically from one corner to the next, pulling and smoothing as you go. You'll find the material often returns to its original shape as it finishes air-drying right there on the sofa.
To Prevent Future Shrinkage: The golden rule is simple. Always use a cool wash cycle (30°C or below) and avoid the tumble dryer entirely. Air-drying is the only guaranteed way to preserve the original size and fit of your covers.
Making this small adjustment to your routine is the key to stopping shrinkage from ever happening again.
What's the Best Way to Get Rid of Pet Hair Before Washing?
Removing stubborn pet hair before the cover hits the washing machine is a non-negotiable step. It not only gives you a much better clean but also saves your machine's filter from getting clogged with clumps of fur. A multi-pronged attack works best.
Start with your vacuum cleaner, using a specialised pet hair attachment to lift the bulk of the fur from the surface. For the hair that's really woven into the fabric, it's time for a clever little trick.
The Rubber Glove Hack: Pop on a clean, dry pair of rubber washing-up gloves and wipe your hand firmly across the fabric. The static and friction this creates will cause the pet hair to ball up into clumps, making it incredibly easy to just pick off by hand.
After vacuuming and the glove trick, a final pass with a sticky lint roller will grab any stray hairs left behind. This thorough prep ensures your cover goes into the wash as hair-free as possible, leading to a far cleaner result.
