


Absolutely. Changing your sofa's colour with dye is a fantastic way to refresh your living space, but it's not a project to jump into blindly. Your success really hinges on two things: the type of fabric you're working with and the sofa's current colour. Get those right, and you're on your way to a brilliant transformation.
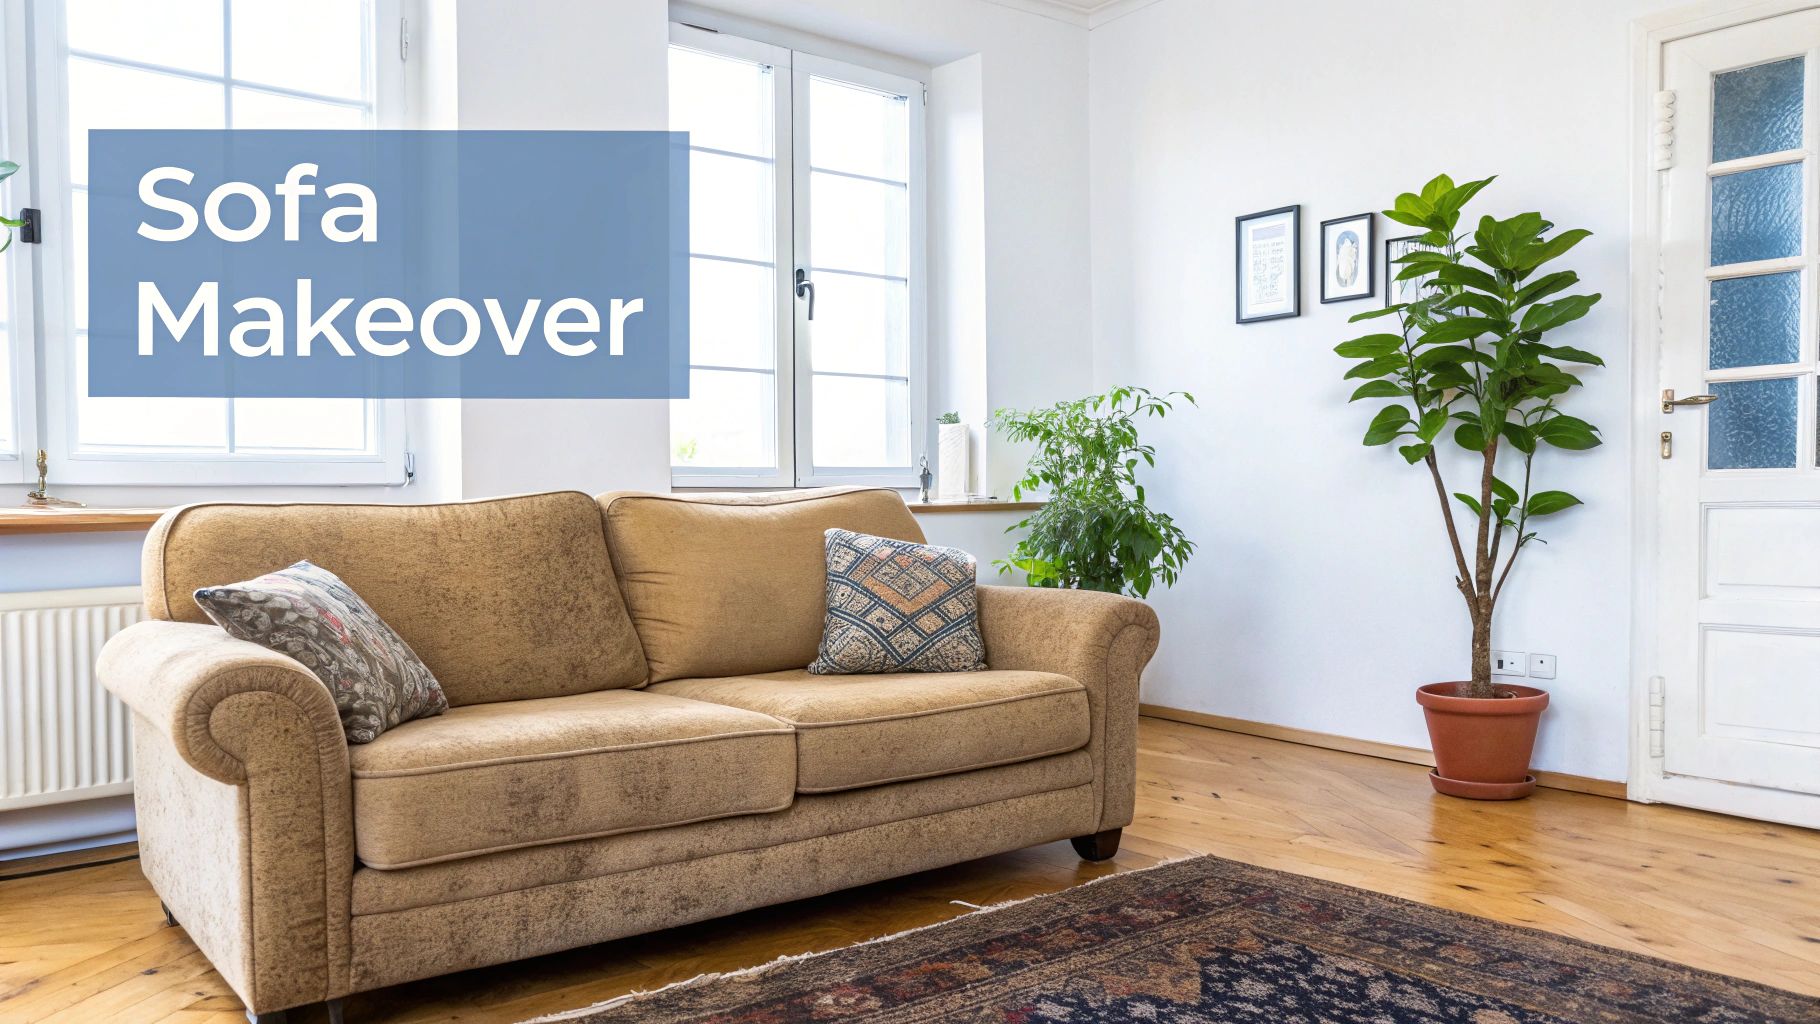
Should You Dye Your Sofa?
Before you even think about picking a dye colour, you need to have an honest chat with your sofa. Seriously. Dyeing upholstery isn't like slapping a new coat of paint on a wall. It’s a chemical reaction, and if the conditions aren't perfect, it can go sideways fast. This initial assessment is your best defence against a DIY disaster that could leave you with a patchy, stiff, or just plain disappointing mess.
First and foremost, you have to know what your sofa is made of. The fabric's composition is everything because dyes are designed to bond with specific fibres.
- Natural Fibres: This is what you want to see. Materials like cotton, linen, rayon, and viscose drink up dye beautifully, which usually means you'll get a rich, even colour.
- Synthetic Fibres: Polyester, acrylic, and nylon are basically plastics. They're non-porous and designed to repel liquids, including water-based dyes. The colour simply won't stick.
- Blends: A lot of modern furniture uses a poly-cotton blend. If the natural fibre content is high enough—I'd say over 60% cotton or linen—you might have a chance. Just be prepared for a more heathered, muted effect, as the dye will only colour the natural threads.
The All-Important Fabric Test
Don't just trust the manufacturer's tag. The only way to know for sure how your sofa will react is to do a patch test. Find an inconspicuous area—the underside of a cushion, a flap on the back, or even a tiny snippet from an inside seam—and apply a bit of the dye. This simple test tells you everything: if the fabric will even take the colour, what that colour will actually look like once dry, and if the dye changes the texture of the material.
Never, ever skip the patch test. It’s the single most crucial step in this entire process. A five-minute test can save you from ruining your furniture and hours of regret.
Next, consider the sofa's current colour and condition. Fabric dye is translucent, not opaque like paint. It adds to the colour that's already there; it doesn't cover it up. This means you absolutely cannot dye a dark sofa a lighter shade. Trying to turn a navy blue sofa into a light grey will just give you a murky, dark blob. Your best results will always come from dyeing a light-coloured sofa a darker hue or simply reviving its existing colour.
Take a good look at the sofa's overall state, too. Are there deep-set stains or heavily worn patches? Dye won't hide them. In fact, greasy or oily spots can block the dye from absorbing, making them stand out even more. If the fabric is already thin and threadbare, the dyeing process could weaken it further.
Fabric Dye Compatibility Checklist
To make it easier, here's a quick reference table to help you figure out if your sofa is a good candidate for dyeing.
| Fabric Type | Dye Suitability | Recommended Dye Type | Key Considerations |
|---|---|---|---|
| Cotton & Linen | Excellent | All-purpose or natural fibre dyes | Absorbs colour very well for a deep, even finish. |
| Viscose & Rayon | Good | All-purpose dyes | Takes colour well but may shrink with hot water. |
| Polyester & Acrylic | Very Poor | None (Specialist dyes exist but are not suitable for upholstery) | These synthetic fibres are non-absorbent and will not dye evenly. |
| Nylon | Poor | Acid dyes (Not recommended for home projects) | Requires heat and specific acids, not practical for a whole sofa. |
| Poly-Cotton Blend | Fair | All-purpose dyes | The result will be heathered; only the cotton fibres will take the colour. |
| Velvet (Cotton) | Good | All-purpose dyes | Can be dyed, but the pile can become stiff. Test is essential. |
| Velvet (Synthetic) | Very Poor | None | Will not absorb the dye. |
This checklist should give you a solid idea of what you're working with, but remember, the patch test is the ultimate decider.
When It’s Better to Look for Alternatives
Sometimes, dyeing just isn't the right answer. If your sofa is made of a synthetic material, has stains that won't budge, or if you're dreaming of going from dark to light, it’s time to change tack.
Reupholstering is the most professional option, giving you total control over the final look, though it comes with a much higher price tag. For a solution that's friendlier on the wallet and far less permanent, a good-quality slipcover can work wonders. In fact, learning how to cover a couch with a well-fitted cover is a versatile and practical alternative that might just be the perfect solution.
How to Choose the Right Dye and Colour
Picking the right dye is the make-or-break moment of this whole project. It’s not just about falling in love with a colour swatch; it's about finding a product that will properly bond with your sofa’s fabric to give you that smooth, lasting finish you’re after. Get this wrong, and you could end up with a patchy, stiff mess, turning a dream DIY into a real headache.
You have to think of fabric dye more like a wood stain than a coat of paint. It doesn't sit on top; it soaks into the fibres and mixes with the colour that's already there. This is precisely why knowing your fabric type is so important. As we mentioned, natural fibres like cotton and linen are brilliant sponges for all-purpose dyes, but synthetics like polyester will just shrug them off. That’s a golden rule you just can’t bend.
Navigating Different Dye Types
Once you start looking, you’ll find a few main types of dye that are up to a job this big. Your goal is to match the dye to your fabric, but also to how you plan on applying it.
- All-Purpose Dyes: These are the ones you'll see in most craft shops. They're usually a blend designed for natural fibres (cotton, linen, viscose) and some poly-blends. For most sofas made from dye-friendly materials, they’re a solid, accessible choice.
- Specialised Upholstery Dyes: As the name suggests, these are formulated just for furniture. They're designed to sink into dense upholstery fabric without making it feel stiff or crunchy. You'll often find them in liquid or spray form, which can be much easier to apply evenly than a powder you have to mix yourself.
- Fibre-Reactive Dyes: For those who are serious about getting a professional result, these are the top tier. They create a permanent molecular bond with fibres like cotton and linen. The result is incredible colourfastness, meaning the colour won't fade or bleed nearly as much over time.
If you want to play it safe, look for a dye specifically labelled for upholstery. These formulas are made with texture in mind, which is your best defence against that awful crunchy feeling you can get when you use the wrong product on soft furnishings.
A huge part of this is checking your sofa's fabric composition tag. If you can't find it or you're just not sure, our guide on choosing the best fabric for a sofa can help you figure out what you’re working with. Getting to know your base material is the essential first step.
Understanding Colour Theory for Dyeing
Because dye is translucent, a little colour theory goes a long way. You aren't covering up the old colour; you're mixing with it. This is where so many projects go sideways. Trying to dye a light blue sofa with yellow dye won’t give you a yellow sofa—it’ll give you a green one.
To avoid any nasty surprises, keep these principles in mind:
- Go Darker: You should always pick a colour that’s darker than the sofa’s current shade. You simply can’t dye a navy sofa a pale, creamy beige. It just won’t work.
- Stay in the Family: For the most predictable outcome, choose a new colour from the same family. Taking a light grey sofa to a deep, rich charcoal, for instance, is a safe and very effective bet.
- Use the Colour Wheel: If you’re determined to change the colour entirely (say, from beige to blue), just remember the result will be a blend. A pale yellow sofa dyed with red will probably turn out a lovely shade of orange.
Luckily, the colour trends here in the UK have shifted towards those beautiful, earthy tones that are perfect for a dye project. Hues like mocha, olive green, rust, and charcoal are tipped to be popular for 2025. Not only do these shades create a wonderfully calm atmosphere, but they’re also fantastic for hiding a bit of wear and tear, making them brilliant for busy family homes.
Calculating How Much Dye You Need
The last piece of the puzzle is figuring out how much dye to buy. Running out halfway through is a complete disaster that almost guarantees a patchy, uneven finish.
As a general rule of thumb, one box of powder dye or one bottle of liquid dye will typically colour about 1 kilogram of dry fabric.
First, you’ll need to estimate how much your fabric weighs. This is a bit of guesswork, but a good method is to weigh your cushions and then estimate the frame’s fabric weight from there. For instance, if a large seat cushion weighs 1.5 kg, and your sofa has two of them, that’s 3 kg right off the bat. A standard three-seater sofa can easily need enough dye for 5 to 7 kg of fabric to get full, rich coverage.
My best advice? Always buy more than you think you’ll need. It is so much better to have a bottle left over than to run out when you’re only halfway done.
Preparing Your Sofa and Workspace
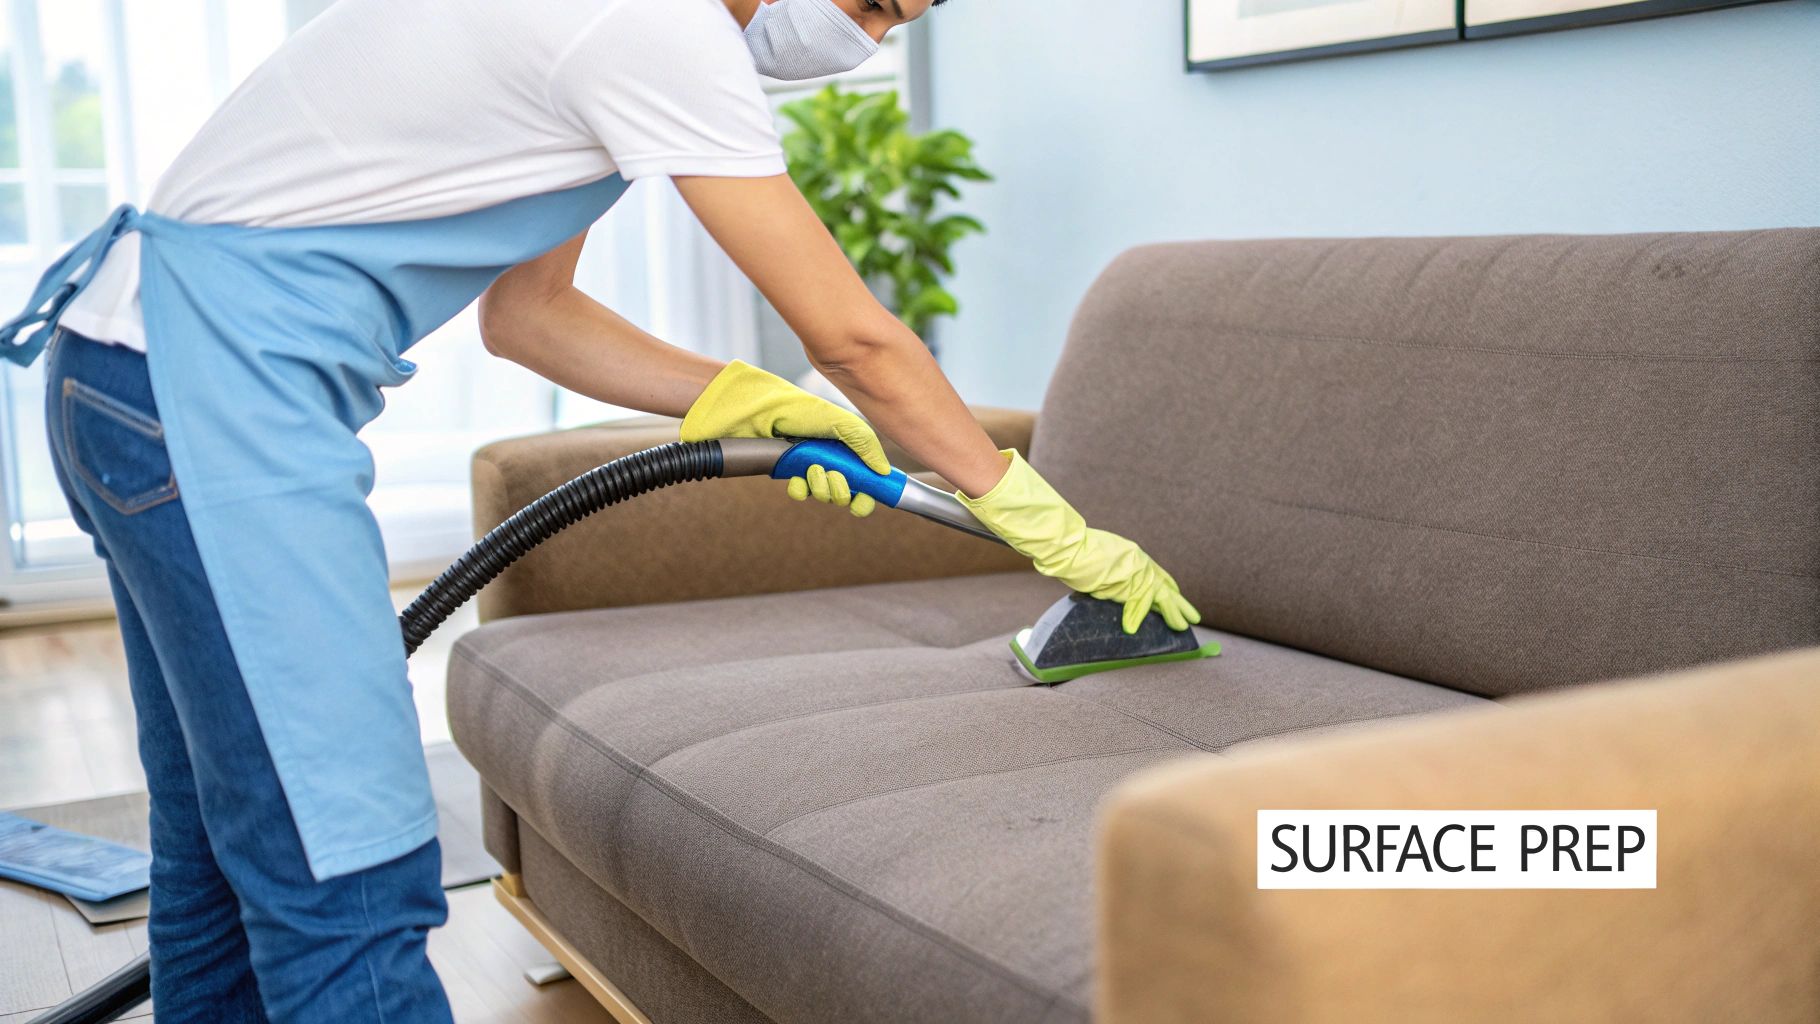
Getting a professional-looking result when you dye a sofa is almost entirely down to the prep work. Honestly, rushing this stage is the quickest way to end up with a patchy, uneven finish, so it’s worth taking your time.
Think of your sofa's fabric like a blank canvas. You wouldn't start a painting on a dirty, dusty surface and expect a masterpiece, and the same principle applies here. Over years of use, sofas collect a surprising amount of dirt, skin oils, and old cleaning product residue. These invisible layers create a barrier, stopping the dye from soaking into the fibres properly. A really thorough, deep clean isn't just a suggestion—it's non-negotiable.
The Essential Deep Clean
Your first job is to get rid of every last bit of dust, pet hair, and crumb. Go over the entire sofa with a powerful vacuum cleaner, using the upholstery attachment to get right into every seam, crevice, and corner. Don't forget to lift the cushions and do the frame underneath.
Once the surface-level stuff is gone, it’s time to tackle the ingrained grime. For this, you’ll need to do more than just give it a quick wipe.
- For Removable Covers: If your covers come off, you're in luck. Pop them in the washing machine on a gentle cycle, but do not use fabric softener. Softeners leave a waxy film that actively repels dye.
- For Fixed Upholstery: If the covers are fixed, you’ll need to clean the fabric in place. The best tool for the job is an upholstery cleaning machine, which you can often hire for a day. Failing that, a good quality upholstery shampoo and a soft-bristled brush will work. Just tackle it in small sections and blot the excess moisture with clean, dry towels as you go.
After cleaning, the sofa must be completely and utterly dry before you even think about opening a bottle of dye. I can't stress this enough. This can take anywhere from 24 to 48 hours. Any lingering dampness will make the dye bleed and pool, leaving you with a splotchy disaster.
Patience is your best friend during this phase. Trust me, trying to dye a slightly damp sofa is a guaranteed way to ruin the whole project. It’s far better to wait an extra day than to live with the regret of a patchy finish.
Setting Up Your Dyeing Station
Fabric dye is permanent and incredibly good at staining everything it touches—your floor, rugs, walls, and any furniture nearby. Protecting your workspace is crucial if you want to avoid turning a simple project into a redecorating nightmare.
Start by finding a well-ventilated area. A garage with the door open or a room where you can get all the windows open is perfect. The fumes from some dyes can be pretty strong, so good airflow is as much about safety as it is about comfort.
Now, let's protect your surroundings.
- Move any furniture you can out of the room completely. If something's too big to move, shift it to the far side of the room and cover it from top to bottom with plastic sheeting.
- Cover the floor with at least two layers of protection. I always start with a large plastic dust sheet, making sure it extends several feet around the sofa. On top of that, lay down some old towels or fabric drop cloths to soak up any drips straight away.
- Keep a roll of paper towels and a bucket of clean water within arm's reach for any immediate spill emergencies.
To Disassemble or Not to Disassemble?
One final thought before you get started: how much of the sofa should you take apart? For the most thorough, professional-looking job, a little bit of disassembly goes a very long way.
If you can, always take the cushions off to dye them separately. This is the only way to get perfect, even coverage on all sides and ensure you don’t miss the fabric on the main frame that’s usually hidden underneath.
You might also want to remove the sofa legs. They often just unscrew, and getting them out of the way means you won't accidentally stain them. It also makes it much easier to dye the very bottom edge of the sofa's frame. Taking an extra five minutes to do this now will save you a lot of fiddly work later and help you get that flawless, all-over colour.
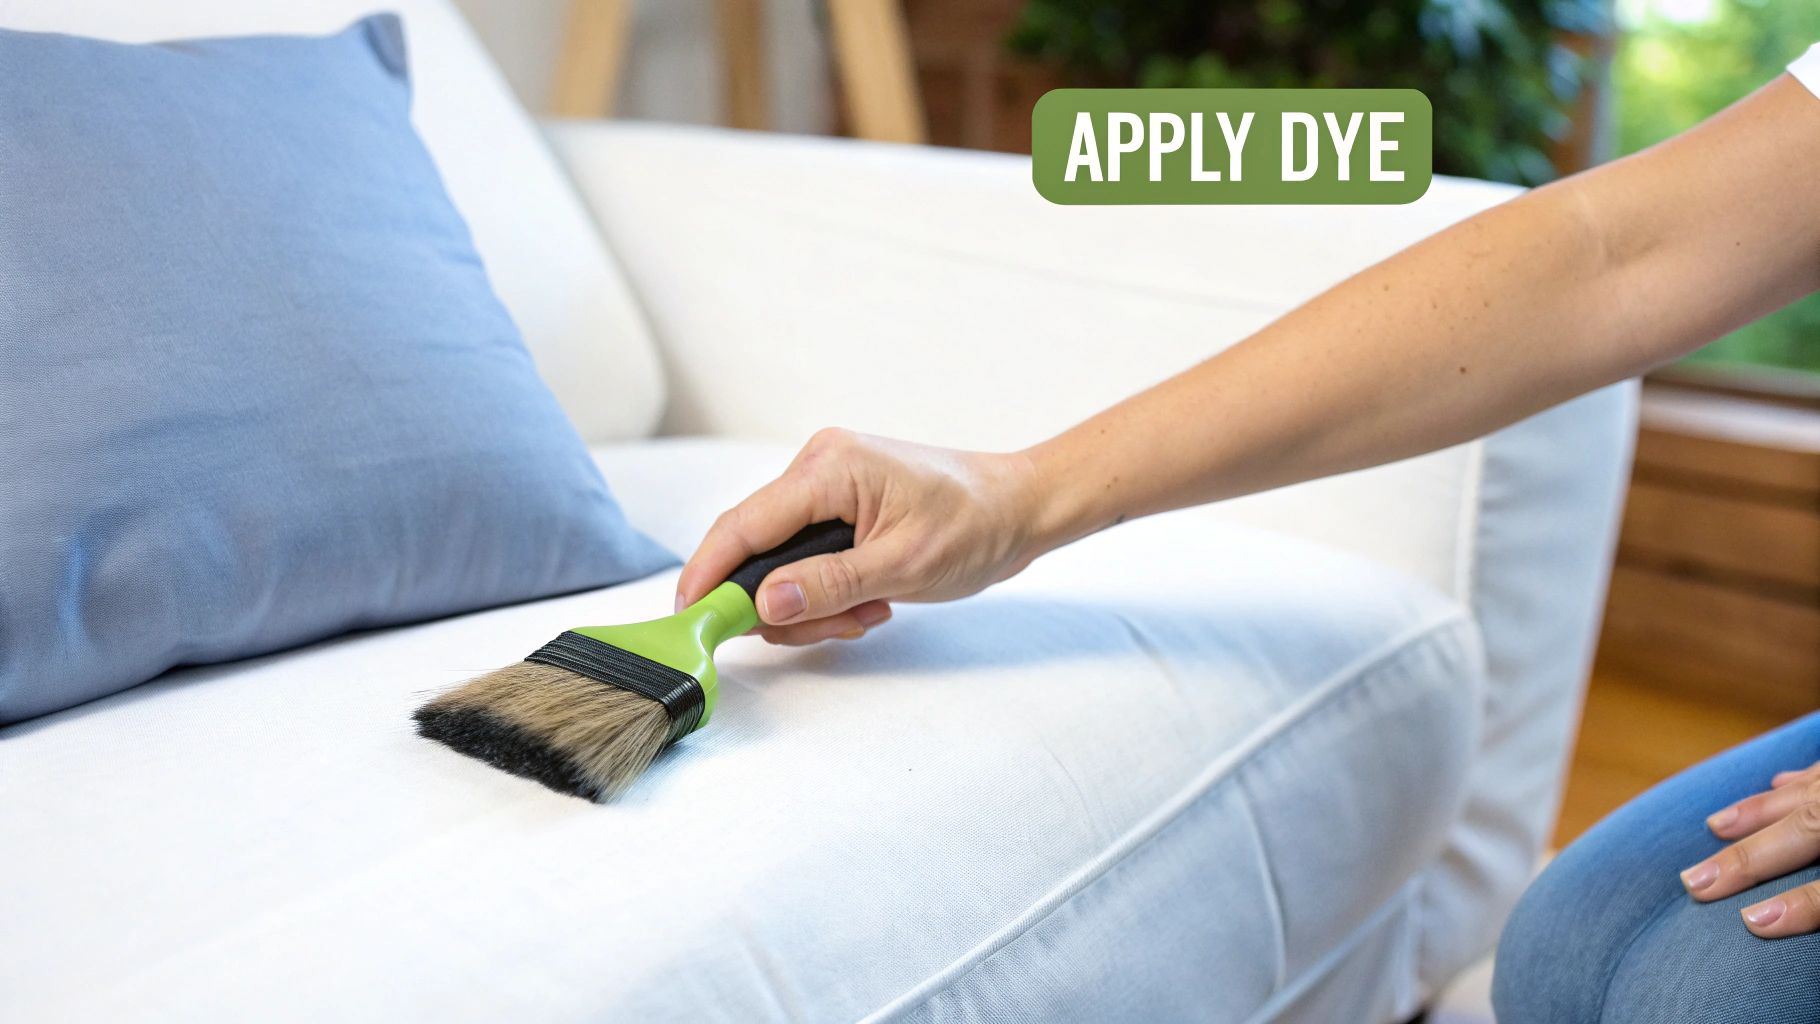
A Practical Guide to Applying Fabric Dye
Right, your sofa is clean, the floor is covered, and your dye is mixed. Now for the fun bit – bringing that colour to life. This is where your careful prep work really pays off. The secret to a professional-looking finish isn't about rushing; it’s about being methodical. How you put the dye on the fabric makes all the difference between a smooth, even colour and a streaky mess.
Whether you opt for a spray bottle, a sponge, or a brush comes down to the type of dye you’re using and what you feel comfortable with. A proper paint sprayer can give you a beautiful, fine mist that’s fantastic for preventing blotches. That said, a simple spray bottle and a soft sponge to gently work the colour in can be just as effective if you take your time.
Starting With a Final Test
Even though you’ve done a patch test, it’s always a good idea to start on a bit of the sofa no one will ever see. The back panel or the frame underneath a seat cushion are perfect spots for this. It’s one last chance to get a feel for your technique and be absolutely certain you love the colour before you commit to the main event.
Think of it as a dress rehearsal. Use this hidden area to perfect your motion – maybe it’s a long, sweeping spray or a gentle circular buff with a sponge. Nailing your technique here builds confidence and helps avoid any nasty surprises later on.
This handy guide summarises the key decisions you've made to get to this point, from checking your fabric type to choosing the right dye.
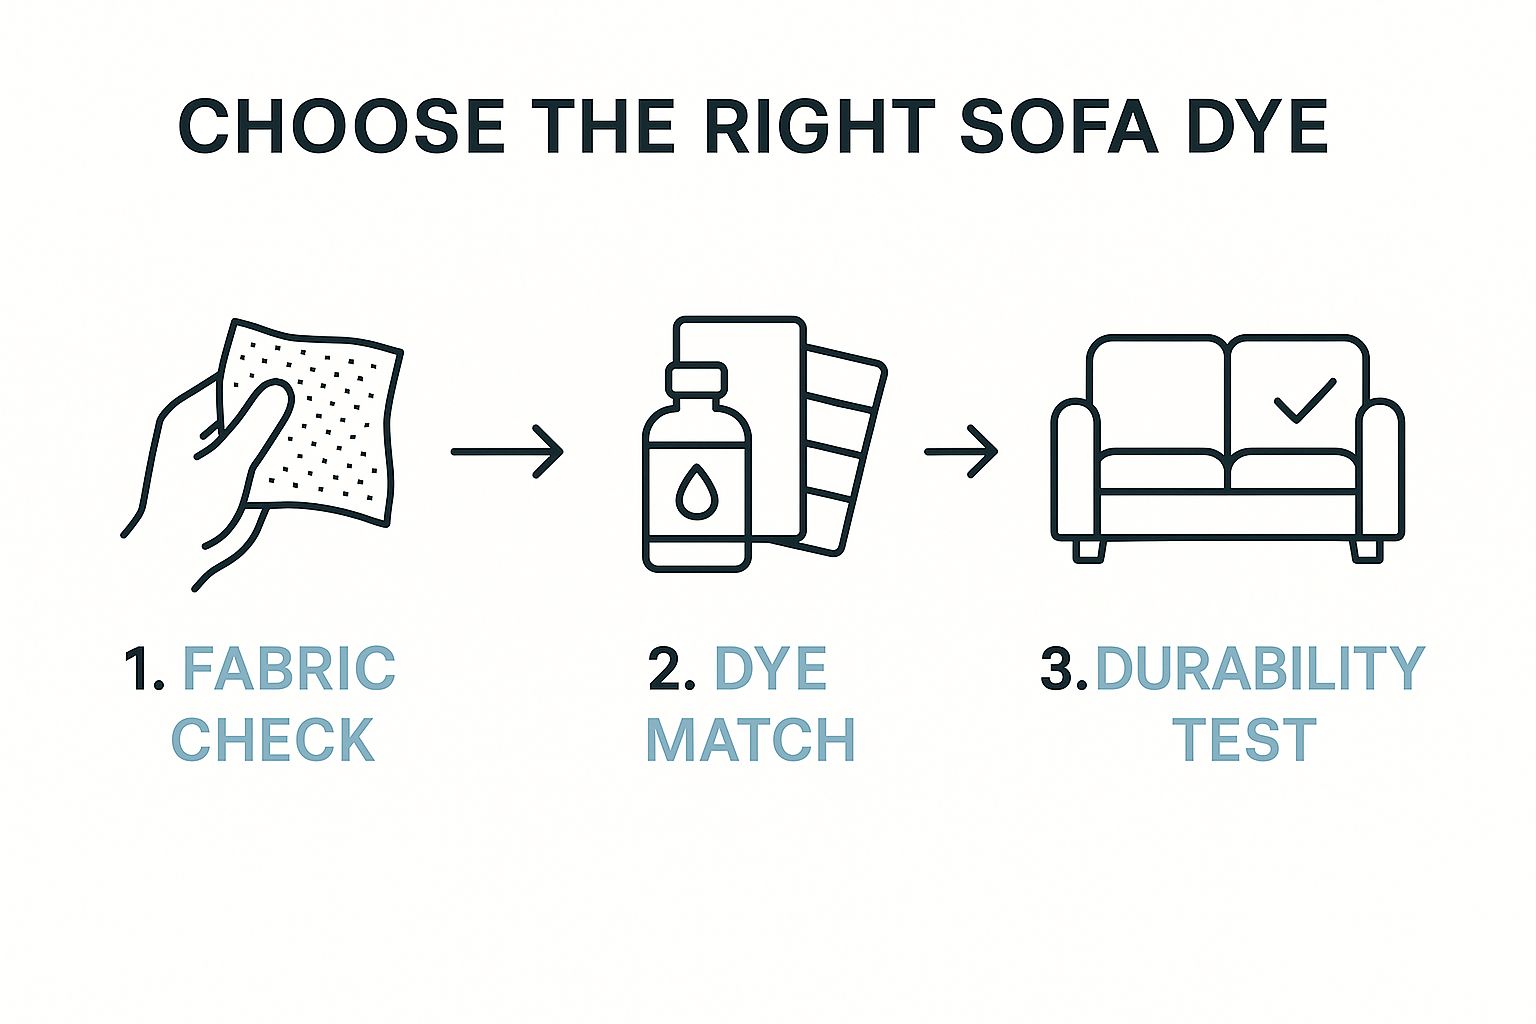
Following this sequence makes sure you’re using a product that’s actually compatible with your sofa, which is half the battle won.
Mastering the Wet Edge Technique
If you take one thing away from this section, let it be this: always maintain a ‘wet edge’. This simply means you should always be applying fresh dye right next to an area that is still wet from the last pass. If you let a section dry before dyeing the area next to it, you’ll get those dreaded, ugly 'lap marks' or streaks.
To pull this off, work in small, logical sections. Tackle one cushion at a time, for example, or work your way across the entire back of the sofa from one side to the other without stopping. Whatever you do, don’t dye a random patch in the middle, pop off for a cuppa, and then come back to it. You need to keep your momentum going until a whole section, like an armrest or a back panel, is complete.
Your goal is to make the fabric look uniformly damp as you work. If you can see a hard line between a wet area and a dry one, you’re at risk of creating a visible seam in your final colour.
It’s worth noting that applying dye has an environmental footprint. The textile industry is a massive consumer of water, and it can take anywhere from 20 to 160 litres of water to dye just one pound of fabric. That's roughly the amount needed for a single sofa. By choosing low-water dye formulas or application methods that minimise waste, you can make your project that little bit greener. You can find more insights on the environmental impact of textile dyes on Alder & BioInsights.
Achieving a Rich and Even Colour
Once the first coat is on, take a step back. The fabric will look much, much darker when it’s wet, so don't panic if the colour looks too intense at first. You absolutely have to let it dry completely according to the manufacturer’s instructions, which can take anywhere from 24 to 72 hours. Patience is your best friend here; you won’t see the true colour until it’s fully dry.
- First Coat Focus: Your main aim for the first layer is simply to get even coverage. Don't try to achieve the final, deep colour in one go. A lighter, consistent coat is a thousand times better than a thick, patchy one.
- Inspecting for Consistency: After it’s totally dry, have a good look at the sofa in bright, natural daylight. Check for any areas that look a bit lighter or where the dye hasn't soaked in as much. It's quite common for high-wear spots to absorb dye differently.
- Applying a Second Coat: Honestly, most projects will need a second coat to get that really deep, saturated colour. It’s also your chance to even out any minor blotches from the first application and build up the richness of the shade.
When you apply that second coat, use the exact same wet-edge technique as before. And make sure you wait for the recommended time between coats – usually after the first one is completely dry to the touch. Rushing this will only re-wet the first layer and can cause it to lift, leaving you with a splotchy mess. Getting this final stage right is the last hurdle to a beautifully transformed sofa.
Setting the Dye and Caring for Your Sofa
So, the final coat of dye is on, and your sofa is looking fantastic. It's a great feeling, but don't get too comfortable just yet—we're not quite over the finish line. The next part of the process is all about making that brilliant new colour last.
Setting the dye is the crucial step that locks the pigment into the fabric's fibres. Without it, you risk the colour rubbing off on your clothes or fading dramatically after the first clean. Trust me, it's a common and heartbreaking mistake that can undo all your hard work. An unset dye will bleed, especially if it gets damp, leaving you with a sofa you can't even sit on.
Thankfully, setting the colour is pretty straightforward.
How to Lock in Your New Colour
The right method really comes down to the dye you've used and your sofa's fabric. The first rule is to always check the dye manufacturer's instructions, but you'll almost certainly be using either heat or a chemical fixative.
-
Heat-Setting with an Iron: This is the go-to for most home projects. Let the sofa get completely bone dry first. Then, set your iron to a medium-high heat with the steam off. Lay a thin, clean cloth (a tea towel is perfect) over a small section and press down firmly for about 15-20 seconds. Work your way across the entire surface, slightly overlapping each section. The heat creates a permanent bond between the dye and the fabric.
-
Using a Commercial Dye Fixative: Some dye kits include a fixative, or you can buy one separately. These are usually spray-on or sponge-on solutions that you apply once the fabric is dry. They trigger a chemical reaction that locks in the dye molecules, which is a fantastic alternative for delicate fabrics that can't handle a hot iron.
Whatever method you use, the trick is to be methodical. Work your way over every single inch of the sofa—cushions, arms, back, the lot. A consistent approach is what guarantees an even, durable finish that will stand the test of time.
Long-Term Care for Your Dyed Sofa
With the colour locked in, it’s time to think about long-term care. A newly dyed sofa just needs a bit more TLC to keep it looking its best. The first clean is a big milestone; hold off for at least a week or two to let the dye fully cure.
When you do need to clean it, steer clear of harsh chemicals, bleach, or steam cleaners, as they can strip the colour right out. A gentle, pH-neutral upholstery shampoo with cool water is always the safest bet for tackling any spills or spots.
The demand for high-quality, long-lasting home textiles is booming. In fact, the UK textile dyes market was valued at around USD 326.7 million in 2023 and is only expected to grow. This just shows how important it is to use quality dyes and care methods to get a finish that lasts. You can read more about the trends in the UK textile dyes market on Market Research Future.
To prevent fading, try to keep the sofa out of direct, prolonged sunlight. If your room layout makes that tricky, a stylish throw blanket can do a great job of protecting the most exposed spots. For an even easier approach, why not have a look at our guide to machine-washable couch covers? They're a simple way to protect your new colour and switch up your style whenever you feel like it.
Common Questions About Dyeing a Sofa
Even after doing your homework, it’s completely normal to have a few last-minute questions before you dive into a project as big as dyeing your sofa. It's a real commitment, and you want to be sure you're getting it right.
Let's walk through some of the most common queries I hear from people. Getting these details sorted can be the difference between a project you’re immensely proud of and one that ends in frustration.
Can I Dye My Sofa a Lighter Colour?
This is probably the number one question, and the honest answer is almost always no. Fabric dye is translucent, so it adds colour to the fabric that's already there rather than covering it up like an opaque paint would.
Think of it like using a highlighter. You can easily go over a yellow line with a blue pen to make it green, but you can't take that blue pen mark and make it yellow again.
So, while you can dye a beige sofa a gorgeous deep navy, you absolutely cannot turn that navy sofa beige. Some people get tempted by the idea of using bleach to lighten the fabric first, but trust me, that’s a very risky path. Household bleach can seriously damage and weaken upholstery fibres, leaving you with a patchy, brittle mess that's impossible to fix.
Your best and most predictable results will always come from dyeing a fabric its existing colour to refresh it, or going from a light shade to a darker one. Trying to go from dark to light is a recipe for disappointment.
Will the Dyed Fabric Feel Stiff or Crunchy?
A crunchy finish is a valid concern, but it’s usually avoidable if you're careful. The final texture really comes down to the type of dye you use and how you apply it.
Your best bet is to use a dye specifically formulated for upholstery. These are designed to sink deep into the fibres without changing their natural feel.
Applying the dye in several thin, even coats is also crucial. If you slather on one thick layer, it's far more likely to sit on the surface and dry into a stiff film. If you do notice a bit of stiffness after the sofa is completely dry, don't panic. Gently brushing the surface with a soft upholstery brush can often bring the softness back. On certain fabrics, a very light pass with ultra-fine grit sandpaper can also help, but always test this on a hidden spot first.
How Long Does the Sofa Dyeing Process Take?
When it comes to dyeing a sofa, patience is your best friend. This is definitely not a one-day job, and setting a realistic timeline is key to avoiding rushed, sloppy work.
Here’s a rough idea of what to expect:
- Deep Cleaning: Getting the sofa properly clean, plus the time it needs to become completely bone-dry, can easily take 24 to 48 hours.
- Application: The actual dyeing might only take a few hours per coat, depending on the sofa's size and your method.
- Drying and Curing: This is the longest part. The sofa needs to be 100% dry between coats and before you can set the dye, which can take another 24 to 72 hours.
All in all, you should probably set aside a long weekend or several days to tackle this properly. Rushing the drying stages is the number one reason people end up with a patchy finish or dye that transfers onto their clothes later.
Is It Safe to Dye a Sofa with Kids or Pets at Home?
Safety should always be your top priority here. While you're applying the dye and throughout the entire drying process, it is vital that the room is extremely well-ventilated. Open every window you can and get some fans going to keep the air moving.
During this time, you must keep children and pets completely away from the area. This prevents them from accidentally touching the wet dye or breathing in any strong fumes.
Once the dye is fully cured and has been set according to the product's instructions, it’s generally considered inert and safe for everyday use. For extra peace of mind, look for non-toxic or low-VOC (Volatile Organic Compound) dye formulas whenever possible.
If the thought of dyeing your sofa feels like too much of a risk or commitment, there's a much easier way to get a fresh new look. At The Sofa Cover Crafter, we offer a stunning collection of stylish, durable, and washable sofa covers that can transform your living room in minutes. Explore our beautiful designs at The Sofa Cover Crafter's website and find the perfect fit for your home.